This post may contain affiliate links which may generate a small commission from clicks that result in a purchase.
Making olive oil at home is a rewarding endeavor with numerous benefits. Firstly, you can enjoy a fresher taste, as homemade olive oil is made from freshly harvested olives, resulting in a more vibrant and robust flavor profile. Secondly, you have control over the quality of the olives and the production process, ensuring that your olive oil is free from additives and contaminants. Lastly, making your olive oil is a sustainable and eco-friendly choice, as it reduces waste and eliminates the need for transportation and packaging associated with store-bought options.
Making olive oil at home may seem daunting unless you use an olive oil press machine. But with some guidance and practice, you can soon become an expert in crafting your very own liquid gold. In this step-by-step guide, we’ll walk you through the essential stages of olive oil production, from choosing the right olives to extracting and storing the oil for future use. Get ready to embark on a delicious and fulfilling journey toward homemade olive oil excellence!
- I. Choosing the Right Olives
- II. Crushing Olives
- III. Malaxing (Mixing) the Olive Paste
- IV. Extracting the Oil
- V. Separating and Filtering the Oil
- VI. Storing Your Homemade Olive Oil
- VII. Enjoying Your Homemade Olive Oil
- VIII. How I Make Olive Oil at Home?
- IX. Frequently Asked Questions
- X. Conclusion on How to Make Olive Oil at Home
Here is a table listing step on how to make olive oil at home process:
| Step | Description |
|---|---|
| Harvesting Olives | Pick olives when they transition from green to black to ensure the highest oil content and flavor balance. |
| Crushing Olives | Crush olives using a stone mill, mortar and pestle, food processor, or blender to create an olive paste. |
| Malaxing (Mixing) | Mix the olive paste to allow tiny oil droplets to merge, making it easier to extract the oil. |
| Extracting the Oil | Separate the oil from the paste using hydraulic press, cloth/mat press, or centrifugal separation. |
| Filtering the Oil | Filter the oil to remove impurities, sediment, and water using coffee filters, fine mesh strainers, or cheesecloth. |
| Storing the Oil | Store the oil in dark glass bottles or stainless steel containers, keeping it in a cool, dark place away from sunlight and heat sources. |
I. Choosing the Right Olives
1. Types of olives suitable for oil production
Selecting the ideal olives for oil production results in achieving the best flavor and quality. There are hundreds of olive varieties, but some of the most popular for oil production include Arbequina, Koroneiki, and Frantoio. Each variety offers unique flavor characteristics, so go ahead and experiment to find the one that best suits your taste preferences.
When it comes to organic olive oil production, the same types of olives are utilized, but the cultivation practices differ – avoiding synthetic pesticides and fertilizers. This results in a unique flavor profile due to organic farming methods and a product that is environmentally friendly and potentially healthier due to a higher content of antioxidants and other beneficial compounds.
| Olive Variety | Origin | Flavor Profile | Oil Yield |
|---|---|---|---|
| Arbequina | Spain | Mild, fruity, with notes of apple, almond, and a hint of pepper | Medium |
| Koroneiki | Greece | Robust, pungent, with flavors of grass, green banana, and pepper | High |
| Frantoio | Italy | Rich, complex, with flavors of artichoke, green leaf, and pepper | High |
| Picual | Spain | Bold, herbaceous, with notes of tomato leaf and a peppery finish | High |
| Picholine | France | Delicate, buttery, with hints of green almond and a slight bitterness | Medium |
| Leccino | Italy | Balanced, fruity, with flavors of ripe olive, almond, and a mild pepperiness | Medium |
2. When and how to harvest olives
- Ripeness indicators
Timing your olive harvest results in achieving the optimal flavor and oil content balance.
| Aspect | Early Harvest Olive Oil | Fully Ripe Olives Oil |
|---|---|---|
| Color | Vibrant green | Golden or yellowish hue |
| Flavor | Bold, grassy, herbaceous, bitter, pungent | Milder, smoother, buttery, less bitter, less pungent |
| Antioxidant content | Higher levels of antioxidants (polyphenols) | Lower levels of antioxidants |
| Yield | Lower oil yield | Higher oil yield |
| Best use | Finishing dishes, salads, dipping | Cooking, sautéing, baking, delicate dishes |
Early harvest olive oil is produced using olives picked at the beginning of the harvest season when the fruit is still green and not fully ripe. This results in an oil with a vibrant green color, bold flavor, and higher levels of antioxidants, specifically polyphenols. The taste profile of early harvest olive oil is typically characterized by pronounced grassy, herbaceous notes, a distinct fruitiness, and a more pronounced bitterness and pungency than oil made from riper olives. Due to its robust flavor and health benefits, early-harvest olive oil is highly valued and often used for finishing dishes, salads, and dipping.
Olive oil made from fully ripe olives is produced when the fruit has reached its peak ripeness, resulting in higher oil content compared to early-harvest olives. The color of this oil is typically golden or yellowish, reflecting the mature fruit and lower chlorophyll content. The flavor profile of oil from fully ripe olives is milder, smoother, and more buttery, with less bitterness and pungency than early harvest oil. Due to its more delicate taste, olive oil made from fully ripe olives is versatile and can be used for various culinary applications, including cooking, sautéing, baking, and more delicate dishes that call for a less assertive oil.
- Hand-picking vs. using tools
When harvesting olives for oil production, handle them carefully to avoid bruising, which can lead to oxidation and compromise the oil’s quality.

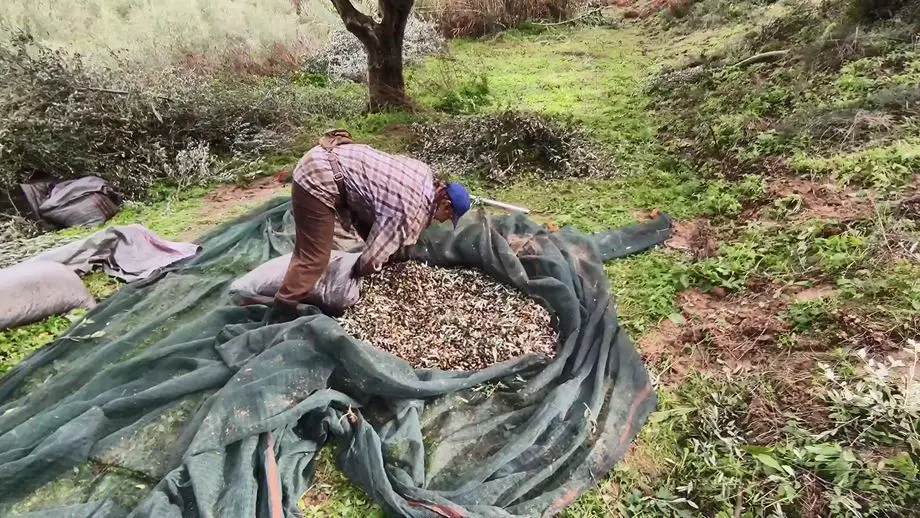
Hand-picking is the preferred method, allowing for gentle handling and precise selection of ripe olives. Alternatively, you can use tools like olive rakes or handheld shakers to dislodge the fruit from branches, but take care to collect them with a soft tarp or net below to prevent damage.
3. Preparing olives for processing
- Cleaning and sorting
Once harvested, cleaning and sorting your olives is crucial to ensure the best quality oil. Rinse the olives under cool running water to remove any dirt or debris. After washing, sort through the olives, discarding any bruised, damaged, or overripe, as these can negatively affect the oil’s flavor and quality.
- Removing leaves and stems
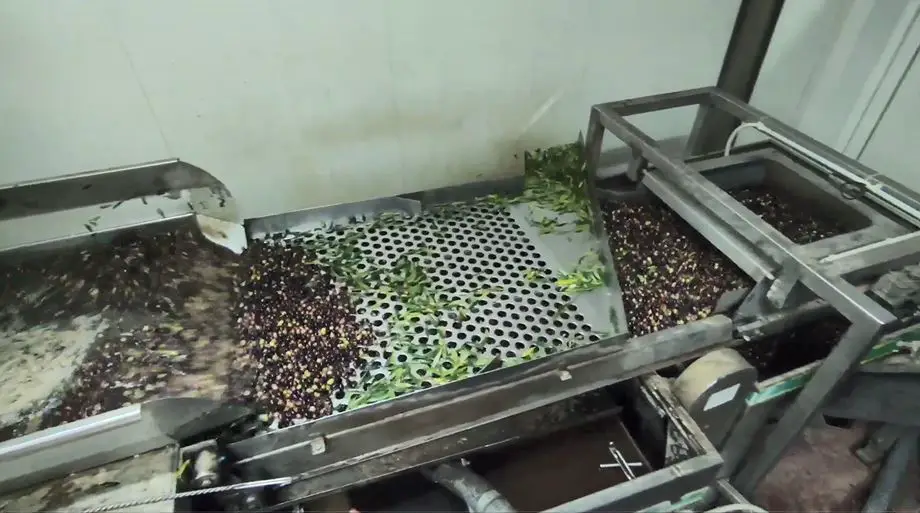
Before processing, remove leaves and stems from the olives, as they can impart a bitter taste to the oil. You can do this by hand or using a fan or blower to separate the leaves and stems from the fruit. After this step, your olives are ready to transform into liquid gold.
II. Crushing Olives
1. Traditional Methods
- Stone mill
In ancient times, olives were crushed using a stone mill, where large stone wheels rolled over the fruit, breaking the flesh and releasing the oil. This method was effective in breaking down the olives while preserving their natural flavors, making it a popular choice among artisanal olive oil producers even today.
- Mortar and pestle
Another traditional method for crushing olives is using a mortar and pestle. This technique involves manually grinding the olives against the rough surface of the mortar with the help of a pestle. While labor-intensive, this method provides excellent control over the crushing process and allows gentle oil extraction.
2. Modern alternatives
- Food processor
For home producers seeking a more convenient and efficient method, a food processor can be used to crush olives. This kitchen appliance quickly and evenly grinds the olives, ensuring a consistent paste that is ideal for oil extraction. When using a food processor, be sure to pulse the olives in short bursts to prevent overheating and retain the oil’s flavor and quality.
- Blender
A blender is another modern alternative for crushing olives, offering a similar level of convenience and efficiency as a food processor. However, be cautious when using a blender, as the high-speed blades can generate heat and affect the oil’s quality. Use a low setting and blend in short intervals to minimize heat exposure.
3. Tips for achieving the right consistency
Regardless of the crushing method, the goal is to achieve a homogeneous olive paste with small, evenly sized-particles. This consistency helps maximize oil extraction during the pressing stage.
To achieve the right texture, avoid over-processing the olives, as this can create too fine a paste that may hinder proper oil separation. Additionally, monitor the temperature during the crushing process to ensure it remains below 80°F (27°C), as higher temperatures can negatively impact the oil’s flavor and quality.
Looking for a Personalized Gift?
Adopt an OLIVE TREE in Greece –
Receive Premium Olive Oil!
III. Malaxing (Mixing) the Olive Paste
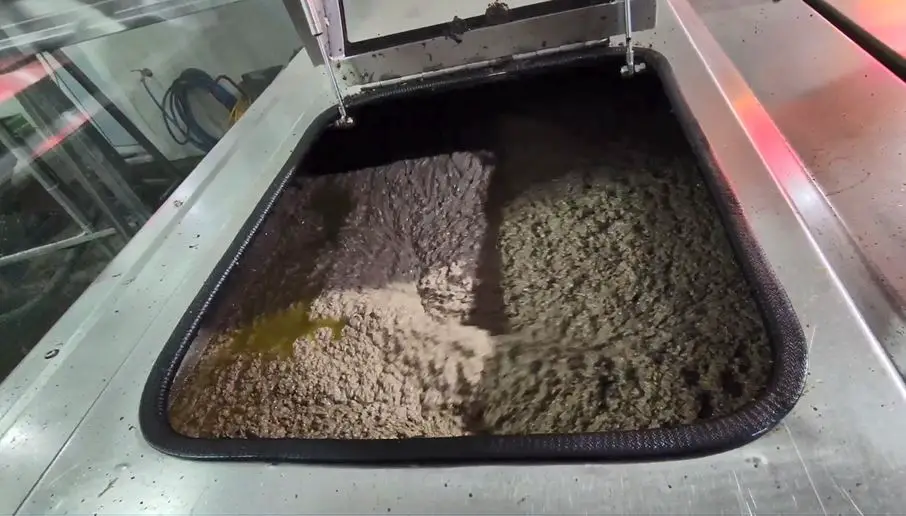
Malaxing or mixing purpose is to facilitate the aggregation of tiny oil droplets into larger ones, making it easier to separate the oil from the water and solid components of the paste.
Additionally, malaxing helps to further break down the olives and release more oil, while also allowing the development of the oil’s unique flavor and aroma compounds.
Techniques for effective malaxing
- Duration and temperature
The duration and temperature of malaxing determine the quality and yield of the final oil. Typically, malaxing should be carried out for 30-60 minutes to allow sufficient time for oil droplet aggregation and flavor development. The temperature during malaxing should be kept below 80°F (27°C) to preserve the oil’s quality and prevent oxidation. Maintaining the right balance of duration and temperature is key to achieving optimal oil extraction and flavor.
- Manual vs. mechanical methods
Traditionally, malaxing was performed manually, where workers would use paddles or other tools to mix the olive paste in large basins. While this method offers excellent control over the process, it is labor-intensive and time-consuming.
In contrast, modern mechanical malaxers provide a more efficient and consistent method for mixing the paste. These machines have a slow-moving paddle or auger that gently stirs the paste while maintaining a controlled temperature. Mechanical malaxers are particularly beneficial for larger batches of olives, as they ensure even mixing and temperature distribution throughout the paste.
Whether opting for manual or mechanical methods, the goal of malaxing is to achieve a well-mixed, homogeneous paste that is ready for the pressing stage of olive oil production.
IV. Extracting the Oil
1. Traditional Methods
- Pressing with a hydraulic press
One of the oldest methods for extracting oil from the olive paste is by using a hydraulic press. The paste is placed between circular mats or filter plates, which are then stacked and subjected to high pressure. The pressure forces the oil to separate from the paste, which can then be collected and filtered.
- Using a mat or cloth
Another traditional method for oil extraction is by spreading the olive paste onto mats or cloths, which are then folded or rolled and squeezed by hand or using a press. The oil seeps through the fabric, leaving the solid components behind. This method can be labor-intensive but offers excellent control over the extraction process.
2. Modern alternatives
- Centrifugal separation
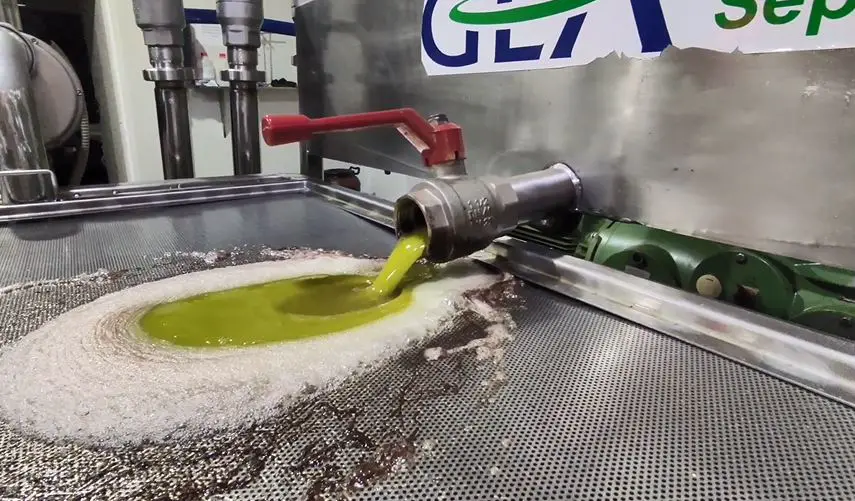
A more modern method for extracting olive oil is through centrifugal separation. This process involves placing the olive paste into a high-speed centrifuge, separating the oil, water, and solids based on their densities. Centrifugal separation is highly efficient and results in a cleaner, more consistent oil.
- DIY solutions
For those making olive oil at home, DIY solutions such as using a cheesecloth to squeeze out the oil or employing a manual press can be effective alternatives. While these methods may not yield as much oil as professional equipment, they still allow for extracting high-quality, homemade olive oil. See pictures under VIII 5 section.
3. Tips for maximizing oil yield
- Proper malaxation: Ensure the olive paste has been adequately malaxed before extraction. This helps to coalesce the oil droplets, making it easier to separate them from the paste and increasing the overall yield.
- Optimal pressing pressure: When using a hydraulic or manual press, apply consistent and appropriate pressure to avoid crushing the olive pits, which can release bitter compounds and negatively impact the oil’s flavor.
- Minimize heat exposure: Keep the temperature below 80°F (27°C) during the extraction process to preserve the oil’s quality and prevent oxidation, which can lead to lower yields.
- Timely extraction: Extract the oil as soon as possible after crushing and malaxing the olives to avoid the risk of oxidation and ensure the freshest, highest-quality product.
- Multiple pressings or centrifugations: If you use traditional methods, consider performing multiple pressings or centrifugations to extract any remaining oil from the paste. However, be aware that the quality of the oil may decrease with each subsequent extraction.
- Proper storage: Once the oil is extracted, store it in a cool, dark place in airtight containers to maintain its quality and freshness, which can also contribute to maximizing the usable yield over time.
By following these tips and paying close attention to each step of the extraction process, you can optimize the yield and quality of your homemade olive oil.
V. Separating and Filtering the Oil
1. Decanting the oil
- Allowing the oil to settle
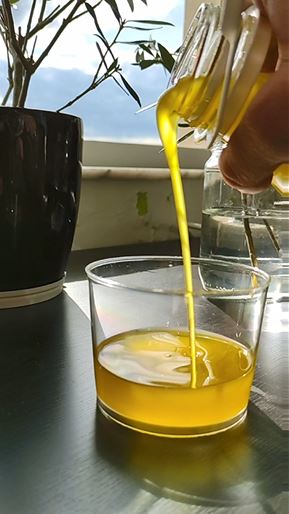
After extracting the oil from the olive paste, let the oil settle for a period, typically 24-48 hours. This process allows the remaining sediment and water to separate naturally from the oil due to their different densities. The oil will rise to the top, making it easier to separate from the water and sediment below.
- Removing sediment and water
Once the oil has settled, carefully decant it by pouring or siphoning it off the top layer, leaving the sediment and water behind. This step ensures that the final product is free from unwanted particles and moisture, which can affect the oil’s quality, taste, and shelf life.
2. Filtering options
- Coffee filters
Paper coffee filters are a simple and readily available option for filtering olive oil. Place a filter over a clean container and slowly pour the oil. The filter will catch any remaining impurities, producing a clearer, more refined oil.
- Fine mesh strainers
Another option for filtering olive oil is using a fine mesh strainer. This method is similar to a coffee filter, but the mesh strainer allows for a quicker oil flow. Be sure to choose a strainer with a fine mesh to catch any residual particles effectively.
- Cheesecloth
A cheesecloth is a versatile filtering tool that can also be used for olive oil. Simply layer the cheesecloth over a container and pour the oil through it. The cloth’s fine fibers will catch impurities while allowing the oil to pass through.
3. The importance of removing impurities
Properly separating and filtering the oil ensures a high-quality final product. Removing impurities like sediment and water improves the oil’s clarity, appearance, taste, and shelf life. Impurities can cause off-flavors, cloudiness, and accelerated spoilage. By separating and filtering your homemade olive oil properly, you’ll enjoy a cleaner, more delicious, and longer-lasting product.
VI. Storing Your Homemade Olive Oil
1. Choosing the correct container
- Dark glass bottles
When storing your homemade olive oil, selecting the appropriate container is crucial. Dark glass bottles, such as amber or green-tinted ones, are an excellent choice because they protect the oil from light exposure, which can lead to oxidation and spoilage. Additionally, glass bottles are nonreactive, ensuring the oil’s taste and quality remain unaltered.
- Stainless steel containers
Another suitable option for storing olive oil in stainless steel containers. These nonreactive containers provide an effective barrier against light and oxygen, helping preserve the oil’s freshness and quality. Ensure the containers have airtight seals to prevent air from entering and causing oxidation.
2. Proper storage conditions
- Temperature and light considerations
To maintain the quality and extend the shelf life of your homemade olive oil, store it under the right conditions. Keep the oil away from direct sunlight and heat sources, as both can cause the oil to degrade and develop off-flavors.
Ideally, store your olive oil in a cool, dark place, such as a pantry or cupboard, with a consistent temperature between 57°F (14°C) and 70°F (21°C).
- Shelf life and freshness
While homemade olive oil can last up to two years if stored correctly, its flavor and nutritional content may diminish over time.
Aim to consume your olive oil within six months to one year of production for the best taste and quality. Regularly check your stored oil for any signs of spoilage, such as cloudiness, off-flavors, or an unusual smell, and discard it if you suspect it has gone bad.
By carefully monitoring your homemade olive oil’s storage conditions and freshness, you can ensure that you’re enjoying its full flavor and health benefits.
VII. Enjoying Your Homemade Olive Oil
1. Tasting and evaluating your olive oil
- Color, aroma, and flavor
Once your homemade olive oil is ready, it’s time to taste and evaluate it. Pay attention to the color, aroma, and flavor of your oil.
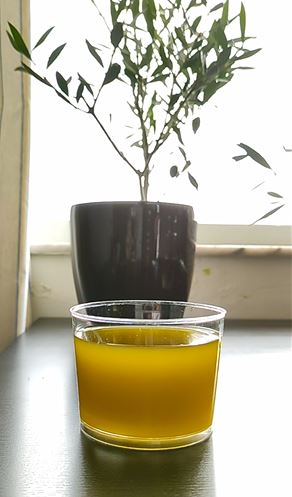
High-quality olive oil should have a vibrant color, a fresh aroma reminiscent of olives or fresh-cut grass, and a balanced, slightly bitter, or peppery flavor. Remember that your olive oil’s specific characteristics will vary depending on the type of olives used and the extraction method.
- Identifying potential improvements
As you taste your homemade olive oil, take note of any aspects that could be improved in future batches. This might include adjusting the ripeness of the olives, modifying the malaxing process, or refining your extraction technique. Remember that making olive oil at home is a learning process, and each batch offers an opportunity to hone your skills and create an even better product.
2. Cooking and pairing suggestions
- Salad dressings
Homemade olive oil is a delicious and healthy addition to any salad dressing. Simply whisk your oil with vinegar, lemon juice, or another acid, along with your favorite herbs and spices, to create a flavorful vinaigrette that complements your salad ingredients.
- Dipping sauces
Olive oil is a versatile ingredient for creating dipping sauces to accompany bread, crackers, or fresh vegetables. Try combining your oil with balsamic vinegar, crushed garlic, and a pinch of salt and pepper for a simple yet tasty dipping sauce.
- Cooking techniques
Your homemade olive oil can also be used in various cooking techniques, such as sautéing, roasting, or grilling. However, extra virgin olive oil has a relatively low smoke point, so it’s best to use it for low to medium-heat cooking or as a finishing oil to drizzle over-cooked dishes.
| Application | ||
|---|---|---|
| Salad Dressings | Vinegar, lemon juice, herbs, spices | Whisk together with olive oil to create a flavorful vinaigrette for salads. |
| Dipping Sauces | Balsamic vinegar, crushed garlic, salt, pepper | Combine with olive oil for a tasty dipping sauce for bread, crackers, or fresh vegetables. |
| Sautéing | Vegetables, proteins, herbs, spices | Use olive oil for low to medium heat cooking to maintain flavor and avoid reaching the smoke point. |
| Roasting | Root vegetables, meats, poultry | Drizzle olive oil over ingredients before roasting to enhance flavor and promote browning. |
| Grilling | Meats, poultry, seafood, vegetables | Brush olive oil on ingredients before grilling to prevent sticking and add a rich, savory flavor. |
| Finishing Oil | Pasta, risotto, grilled vegetables, soups, stews | Drizzle olive oil over cooked dishes for a burst of fresh flavor and a glossy, appetizing sheen. |
3. Sharing your olive oil with friends and family
One of the most rewarding aspects of making your olive oil is sharing the fruits of your labor with friends and family. Package your oil in attractive bottles or containers and give them as gifts, or invite your loved ones for a meal featuring your homemade oil.
Searching for Premium Olive Oil?
Get OLIVIADA Olive Oil from Kalamata, GREECE!
VIII. How I Make Olive Oil at Home?
1. Ingredients
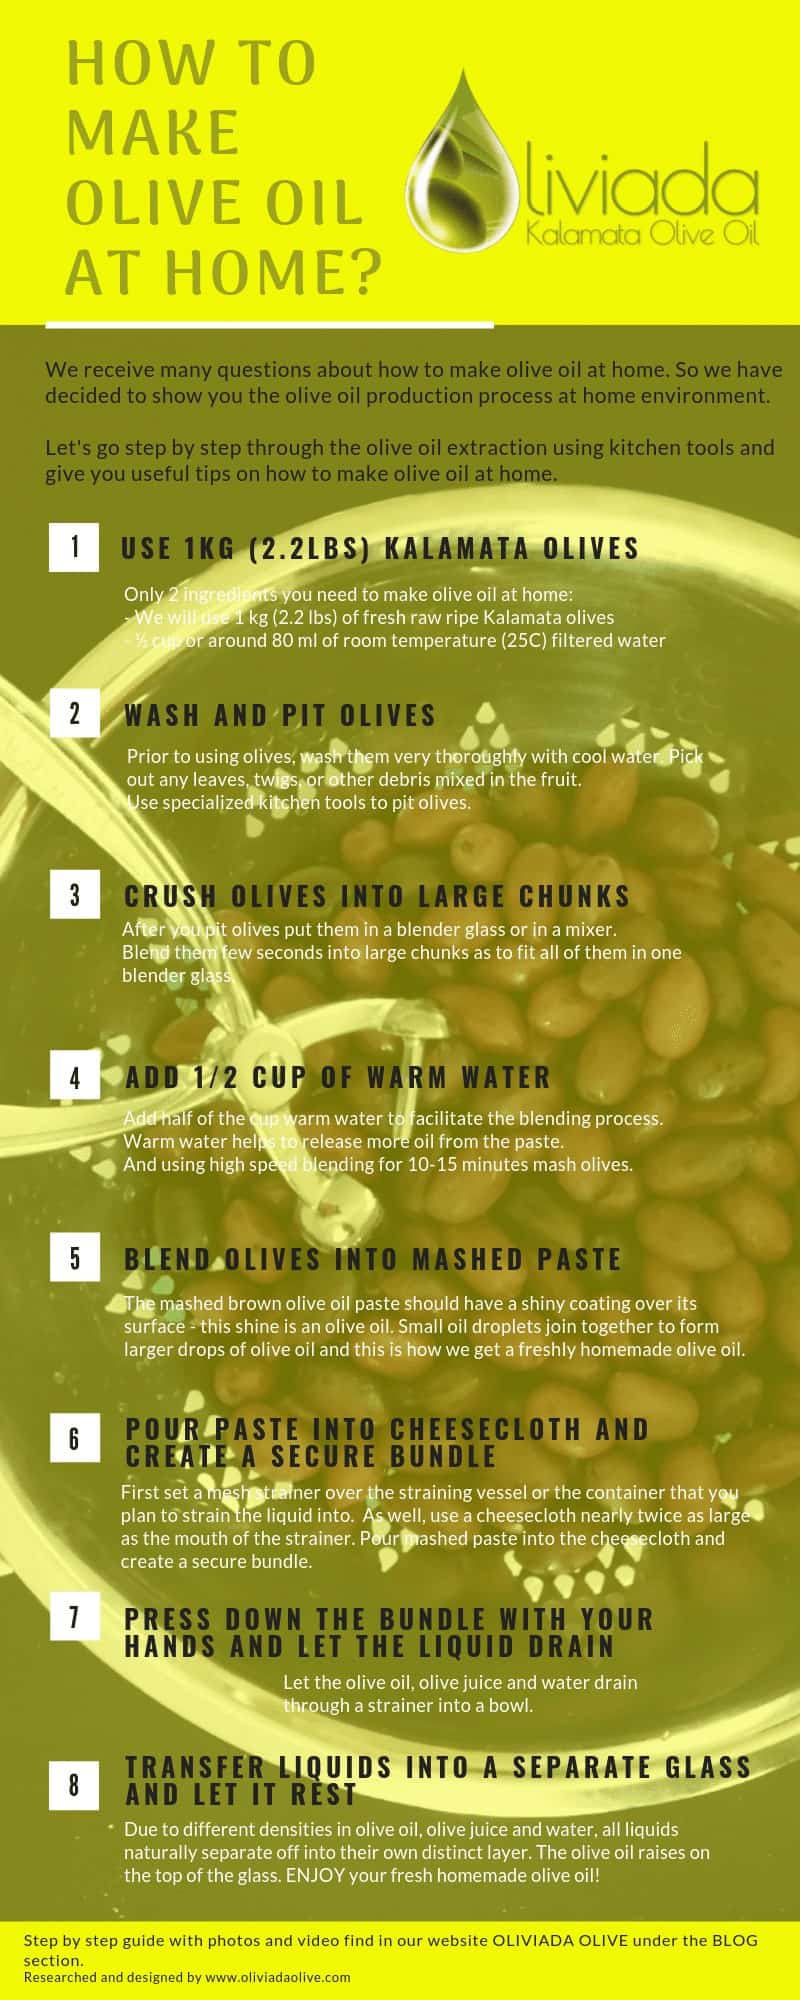
The great thing about this process, I need only two ingredients to make olive oil at home! Yes, that’s right – I only need fresh raw olives and room-temperature water.
To make homemade olive oil, I will use the following:
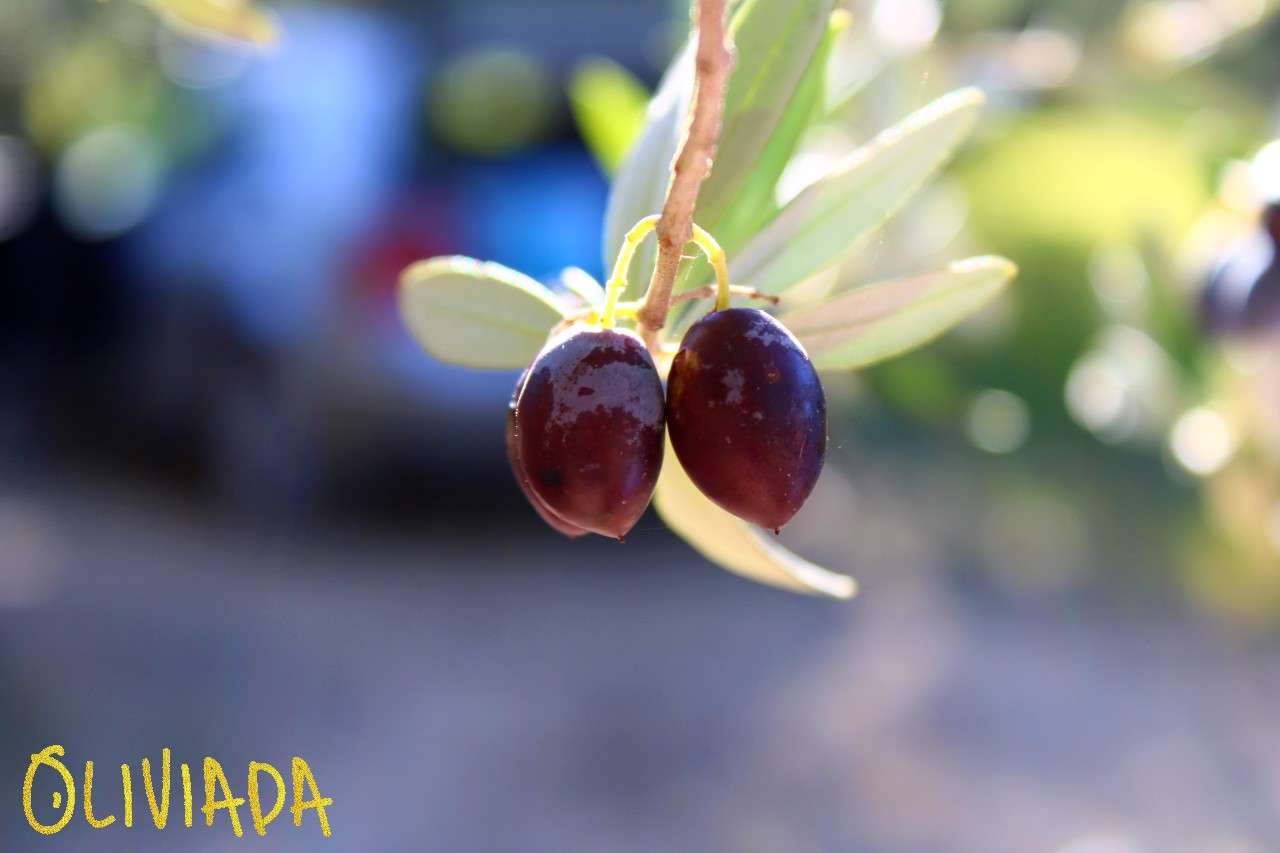
- 1 kg (2.2 lbs) of fresh olives ( I am going to use Kalamata olives)
- ½ cup or around 80 ml of room temperature (25C) filtered water
2. Kitchen Tools
Great news, you don’t need any fancy kitchen tools for oil processing in your kitchen. The most important is an olive pitter and a blender or mixer. Thus, you can mix and match the rest of the kitchen appliances with what you already have in place.
As to make it faster and easier, I added links to products available on Amazon in case you are interested in making olive oil at home and are looking for the right tools:
Last update on 2024-04-21 / Affiliate links / Images from Amazon Product Advertising API
- Blender and olive pitter is the most needed kitchen tools for olive oil making at home
- Colander
- Cheesecloth
- Strainer
- Glass
3. Olives Preparation
1. Get Raw Fresh Olives
In my experiment, I will use raw fresh ripe Kalamata olives for this process. Also, you can use other olive varieties, but Kalamata olives are known due to their high level of antioxidants and nutritional value.
Please bear in mind olives can be ripe or unripe. Both unripe green olives and fully ripe black olives have similar health benefits. More about differences in many aspects you can read in my article green olives vs black olives.
2. Wash Olives Very Well
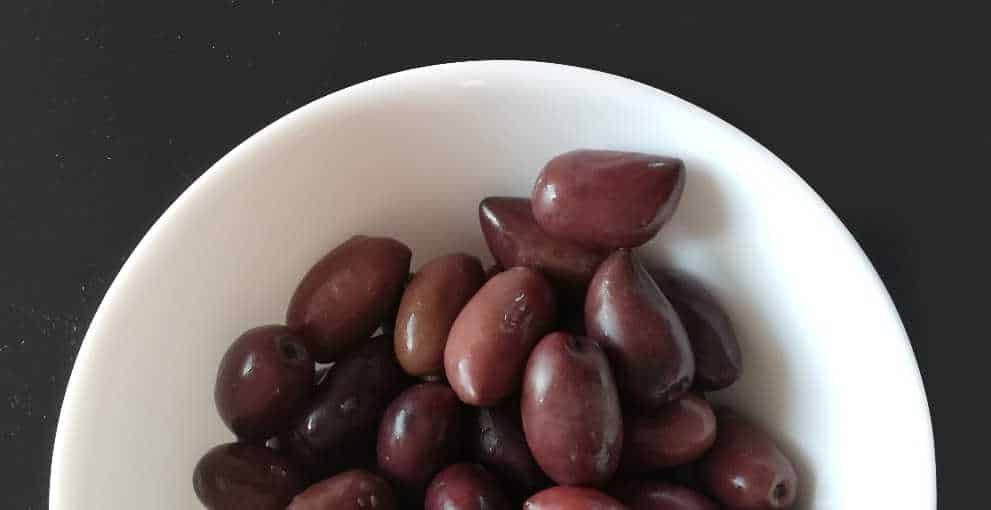
Before using olives, I wash them very thoroughly with cool water. Pick out any leaves, twigs, or other debris mixed in the fruit. After washing olives, I leave them to drain in a colander or on a paper towel.
Thus, the olives don’t need to be perfectly dry since I will mash them, and any water will eventually separate from the oil during processing.
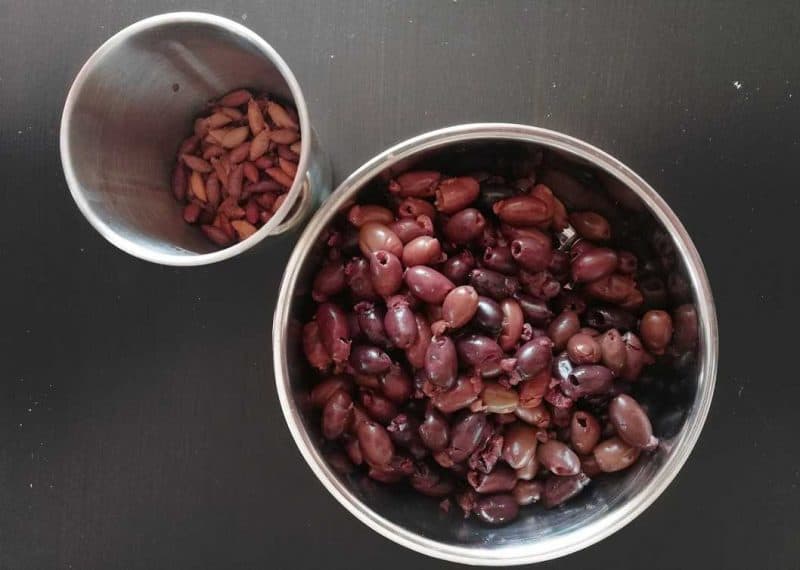
3. Pit Washed Olives
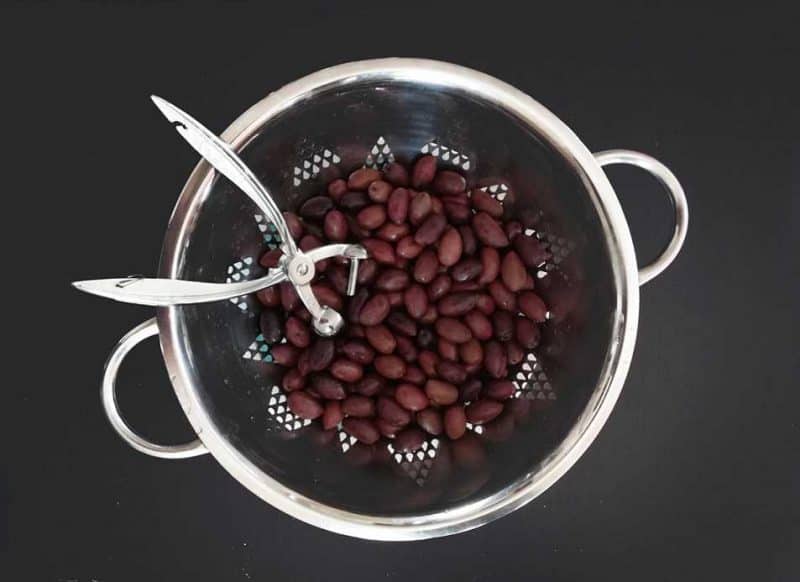
I use specialized kitchen tools to pit olives. It takes at least 40 minutes to pit each olive (for 1 kg batch) and prepare for a pressing olive oil step.
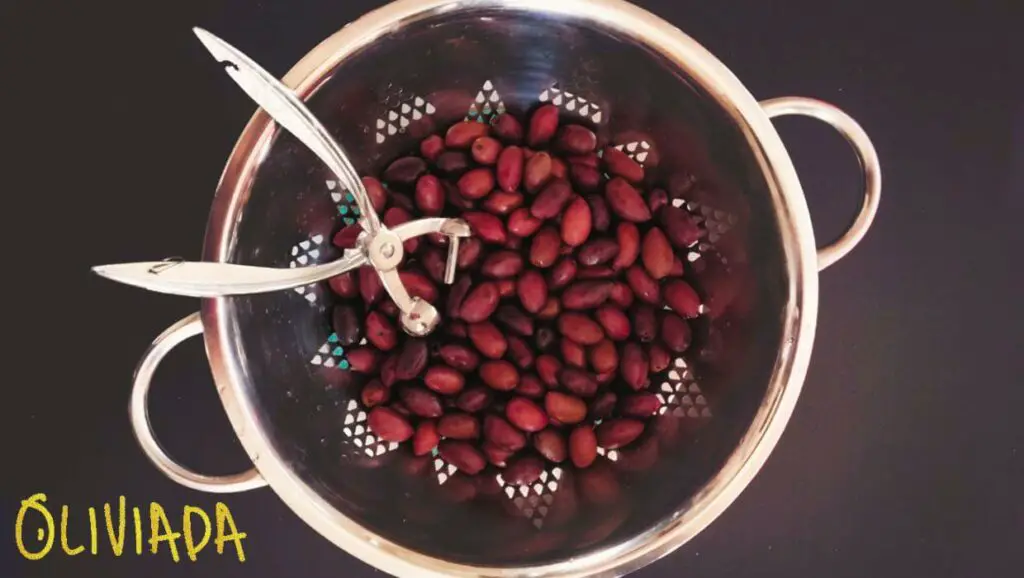
If you don’t have an olive pitter tool in your kitchen, as per the image, you can try a knife but be very careful. And it would take much longer to prepare seedless olives.
4. Crushing and Pressing Olives
1. Crush Olives into Large Chunks
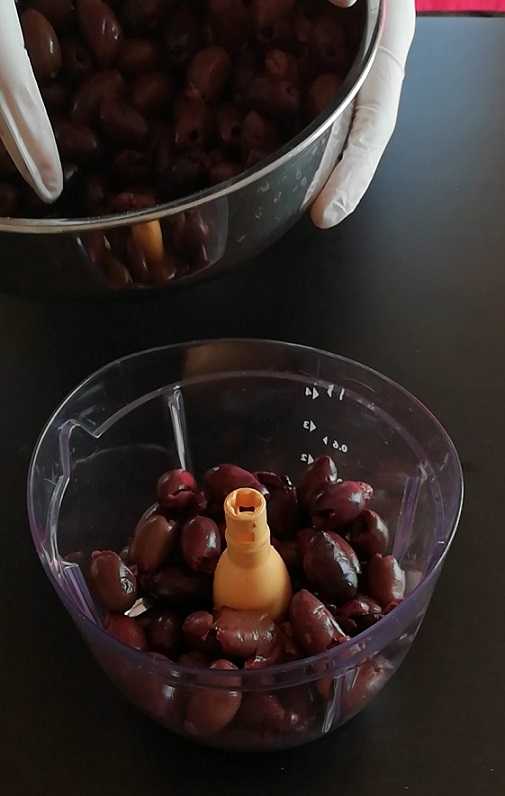
After I pit olives, I put them in a blender glass or a mixer. I blend them a few seconds into large chunks to fit all in one blender glass.
2. Add 1/2 Cup of Warm Water
I add half of the cup of water into the blender to facilitate the smooth upcoming blending process. For this reason, we use room temperature water (a bit of warm water is even better) cause it helps to release more oil from the paste.
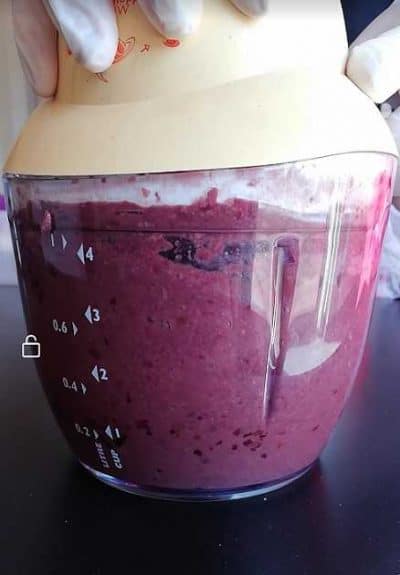
I use a medium-speed blending for 10-15 minutes to mash olives into a thick, brown olive paste.
3. Mash Olives into a Brown Paste
The mashed olive paste should have a slightly shiny coating over its surface. This shine is olive oil. The olive-crushing process breaks apart the flesh of the olives, thereby releasing the fruit oil contained within the cells.
As a result, tiny oil droplets join together to form larger drops of olive oil, which is how I get freshly homemade olive oil.
5. Extract Olive Oil
1. Use a Cheesecloth to Extract Liquids
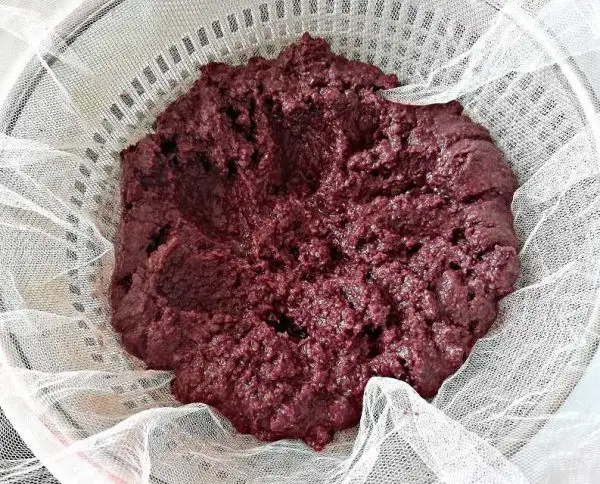
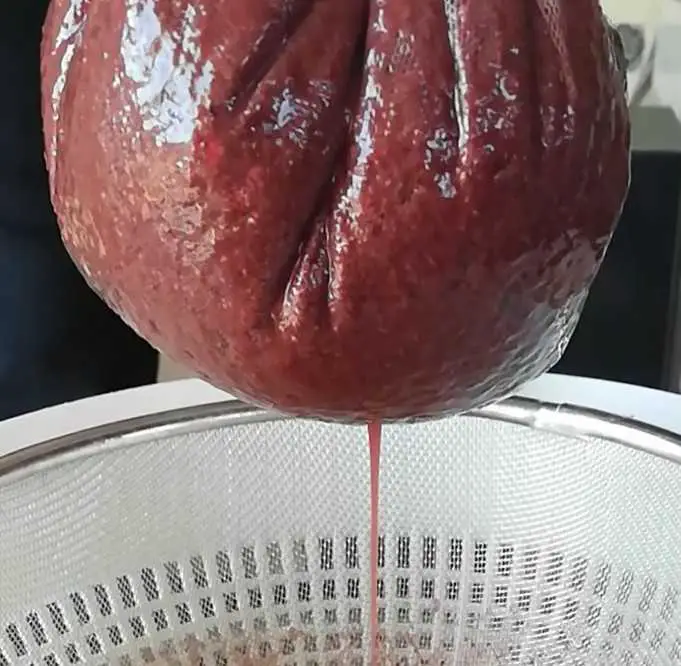
For extracting olive oil, first, I set a mesh strainer over the straining vessel or container into which I plan to strain the liquid. Also, I use a cheesecloth nearly twice as large as the mouth of the strainer.
If you don’t have a cheesecloth, you can use substitutes – a linen cloth, paper towel, or coffee filter. Cover the top of the strainer with a cheesecloth and pour the mashed olive paste, including all visible liquid and solids. Pour it directly to the center of the cheesecloth and wrap up the sides of the cheesecloth over the mashed olive paste, creating a secure bundle.
2. Extract Liquids
I press down the bundle with my hands to help the extraction process and let the liquid drain. Then I press it as long as there is liquid in the bundle.
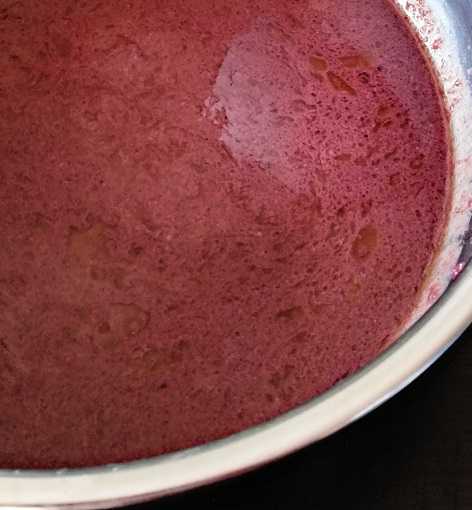
I let the olive oil, olive juice, and water drain through the cheesecloth and strainer for around 10 minutes.
3. Transfer Liquids to a Separate Dish
Once the liquids are drained through a strainer into a bowl, I transfer them into a separate glass or tall see-through container.
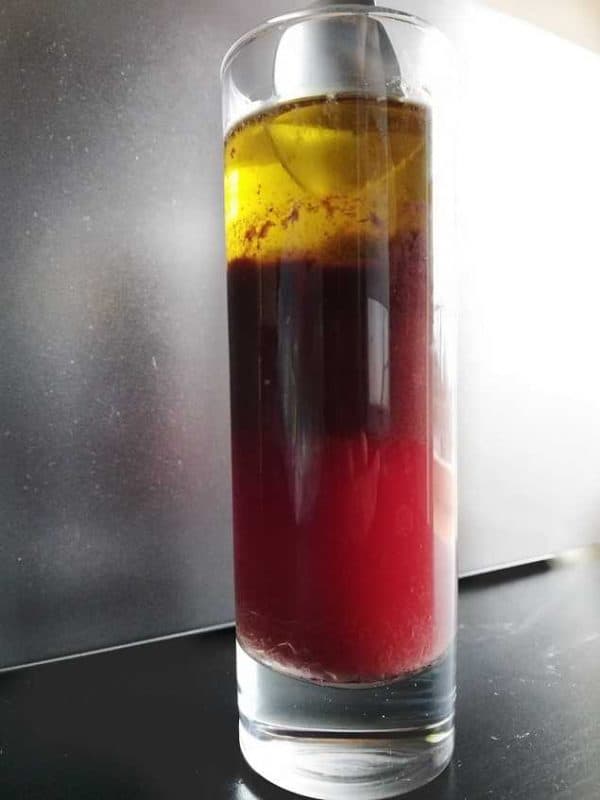
Due to the gravity and different densities in olive oil, olive juice, and water, all liquids naturally separate into their distinct layer. The olive oil layer should rise to the top of the glass. Importantly, I keep the liquids to rest for a couple of hours to rest and separate them from each other.
6. Enjoy Homemade Olive Oil
Well done if you get up until this step! That’s almost it – last thing, but not least – I use a spoon to take off the freshly extracted olive oil from the top of the glass and transfer it to a separate dish.
I use a dark glass bottle with a solid cork or lid. Ideally, store it in a dark, cool place – avoid the sun’s rays. Well done! Now you can use and taste your freshly homemade olive oil!
Since your made olive oil so fresh that you can proudly use it straight away for:
- salad dressing or a dip with a piece of homemade bread
- cooking or baking a dinner for a family
- oil for air fryer french fries
- making DIY infused olive oil to get a specific flavor
- drinking olive oil first thing in the morning to boost your wellness
- beauty benefits for the face, skin, hands, and nails
- other practical olive oil uses around the house
7. DIY Olive Oil Making Pros & Cons
| Pros | Cons |
|---|---|
| Fresh, high-quality product | Time-consuming process |
| Control over ingredients and methods | Limited production scale |
| Sustainability and eco-friendliness | Initial investment in equipment and tools |
| Potential for customization | Learning curve and skill development |
1. Pros
High-quality olive oil
Overall, by squeezing olives yourself and using only kitchen tools and room temperature water, the results are rewarding. Notably, the olive oil made at home is unfiltered, fresh, clean, and high quality. You get extra virgin olive oil if olives are raw, just picked from the tree!
Educative process
For instance, extracting olive oil at home process can be a great example for your kids to show how you get a golden oil liquid from the olive fruit. As well as to demonstrate how the different density liquids are separated from each other. Altogether, it might be a fun and playful process with some lab elements :)
2. Cons
Freshly harvested olives only
Indeed, you can make olive oil at home only from freshly picked olives. Unfortunately, canned or processed olives won’t do a job. Ideally, you should use olives for squeezing olive oil the same day olives were picked from the tree. Hence, you can wait for a few days, but the longer you wait to produce the oil, the less flavor and quality of oil you will get.
Time-consuming and labor-intensive process.
Overall, the olive oil extraction process at home took around 2 hours. I also used about 1kg of olives to make 70 ml of olive oil.
So much expensive – do your maths!
If you don’t have your olive groves, you will need to find a farm and buy raw just picked olives. For example, I pay around 6 EUR (~7 USD) in Greece for 1 kg Kalamata olives, and I squeeze around 70ml olive oil.
So to get 500ml of pure olive oil, I need to buy approx 7kg olives and pay 43EUR (~49 USD)! However, if you buy already branded and bottled premium quality olive oil from a respective producer, you can get it for 20 EUR (~23 USD).
By looking into maths, it’s too expensive to make olive oil at home. Because I can get twice as much excellent quality olive oil for the same price I pay for raw olives, also, I save so much time.
Small quantity of olive oil
On the whole, I can only make a small quantity of olive oil while using your kitchen tools. The large-scale production of olive oil for commercial or personal needs requires special machinery and market know-how.
IX. Frequently Asked Questions
Can you make olive oil at home?
Yes, you can make olive oil at home by following a series of steps that involve harvesting olives, crushing them into a paste, malaxing the paste, extracting the oil, and filtering and storing the oil. While the process requires time and effort, it’s a rewarding and educational experience that allows you to create a fresh, high-quality product.
How many olives make an oil?
The number of olives needed to produce oil varies depending on the size and oil content. It takes about 4 – 5 pounds (2 – 2.5 kg) of olives to produce a single cup (8 ounces = 230 ml) of olive oil.
How do you crush olive pits?
Crushing olive pits can be done using a traditional method like a stone mill or a modern appliance like a food processor or blender. When using an appliance, be cautious not to over-process the olives, as this can cause the pits to break apart and release bitter flavors into the oil.
How long does homemade infused olive oil last?
Homemade infused olive oil typically lasts 1-2 months if stored in a cool, dark place and in a sealed container. To ensure the freshness and safety of your infused oil, discard it if you notice any signs of spoilage, such as an off smell or mold.
Can olive oil go bad?
Yes, olive oil can go bad over time, especially if not stored properly. Heat, light, and oxygen exposure can cause the oil to spoil and develop rancid flavors. To maintain the quality and freshness of your olive oil, store it in a cool, dark place and use it within six months to one year.
How long does homemade olive oil last?
Homemade olive oil can last up to two years if stored properly. However, for the best taste and quality, it is recommended to consume the oil within six months to one year of production. Regularly check the oil for signs of spoilage and discard it if you suspect it has gone bad.
What types of olives are best for making olive oil at home?
The best olives for making olive oil are those with high oil content. Some popular varieties include Arbequina, Koroneiki, Frantoio, Leccino, and Picual. The specific variety you choose will depend on the flavor profile you prefer and the availability of olives in your area.
When is the best time to harvest olives for making olive oil?
The ideal time to harvest olives for making olive oil is when they transition from green to black. This is when the olives have the highest oil content and the best balance of flavors.
What is the best way to store homemade olive oil?
The best way to store homemade olive oil is in a dark glass bottle or stainless steel container with an airtight seal. Keep the oil in a cool, dark place, away from direct sunlight and heat sources to maintain its freshness and quality.
X. Conclusion on How to Make Olive Oil at Home
In summary, we illustrated and guided how to make olive oil at home using raw, freshly picked Greek Kalamata olives and kitchen tools. Indeed, it is an excellent way to get pure, unfiltered extra virgin olive oil at home if you can get raw fresh olives just picked from olive trees without significant effort.
However, for a large olive oil consumption regularly, it is much easier to get the olive oil cold-extracted by small local farms. For example, per the statistical average, a Greek person consumes 12 kg (26 pounds) olive oil per year, so imagine how much time and energy it would require to make olive oil at home :)
Tell us how did you enjoy yourself throughout the process and enjoy your fresh olive oil pressed at home!
Local Greek Farm Produced Olive Oil
If you prefer to save your time and energy for your own hobbies and interests, we recommend trying our family 100% unfiltered, pure Greek extra virgin olive oil made from Kalamata olives.

Read Next
Oliviada Olive Oil Extraction Process – First Cold Pressing
Learn More
- Extra Virgin Olive Oil vs Olive Oil
- Kalamata Olive Oil: Everything You Need to Know
- Best Olive Oil Worldwide 2020
- 7 Benefits of Drinking Olive Oil
Hi, I’m Vangelis Kleftogiannis, the founder of Oliviada and an established olive oil expert from Kalamata, Greece. My expertise isn’t just in producing quality Extra Virgin Olive Oil, but also in the cultivation and care of olive trees themselves. I am deeply committed to sharing my knowledge and know-how, helping others understand the intricacies of olive tree growing and the creation of quality olive oil.


Thank you for simplifying the process as you’ve done here. Very easy to follow. Can I mix more than one variety of olives for the same batch of oil to get the most out of our 4 different varieties in our home garden?
Hi Saki, happy my article is easy to follow. If you mix varieties of olives, then you will get a blended olive oil :) You can still go ahead and make your own blended olive oil. The amount of olive oil may differ due to different varieties of olives: some of them produce more olive oil than others. Just make sure olives are fresh, ideally, picked the same day. There as, the pure olive oil is made from only one variety of olives, in my case, i.e. Kalamata olives.
Hi Vangelis.Great blog to follow.
I’ve followed your steps and made a paste.When passing through the cheesecloth all paste went through again.The paste was probably too liquid.I used around 3 kg of olives and the water as per recipe.Is there a way to extract paste and to make it more solid to get finall oil:-)?
Hi Ray, thanks for your nice words! well done for trying to make your own olive oil. It’s an old way to squeeze olive oil at home and require lots of manual labor :) You should try to use more thick cheesecloth (higher grade) – and after you squeeze paste through it you get liquid which consists of olive paste or leftovers, water, and olive oil. You need to wait for olive oil to settle on top. I believe you can skip water but the blending process will be difficult unless you have an advanced kitchen blender. As well, it’s important to use fresh olives, and depending on the olive variety you get more or less oil. Hope it helps!
Hi there,
Thanks for the blog. Really interesting.
So… our situation is a bit different – we just moved to a new house and we have about 30 olive trees, and it’s olive season now – so we were thinking of making the oil ourselves. Obviously, your method suggested won’t really work for us – because it’s too much work for so many olives – do you have advice on how to make edible olive oil from a very large quantity of olives?
Thank yo
Good day! thank you for your nice feedback! Indeed, your situation is very different from what we explained in the article :) to be honest with your amount of olive trees (and each tree provides 20-30kg of olives) without industrial tools it’s very time-consuming and barely possible to do all the jobs yourself. The moment you cut the olive from the tree, you need to squeeze olive oil in the next 8 hours to get maximum health benefits and all nutrients. So the easiest and fastest way to make extra virgin olive oil out of it is to bring olives in brown sacks into an olive mill. The best way is to search for the closest olive mill in your area for next year harvest :)
Hello and thank you for this guide.
We took some olives and used a hydraulic piston to crush them. We didn’t end up with a mash as such – but we did end up with a lot of liquid.
We have put it aside and are left with the juice and water – but we don’t appear to have any oil.
Why would this be?
Thanks
Hi Liane, which olives did you use? have you used fresh just-picked olives? Fully ripe or early harvest green olives? Olives contain around 15% fat and if you use fresh ripe olives you will see oil separating after malaxing and mixing them well.
Do you deliver your oil to Australia?
Hi Nas, yes, we ship our Oliviada olive oil to Australia with DHL.