This post may contain affiliate links which may generate a small commission from clicks that result in a purchase.
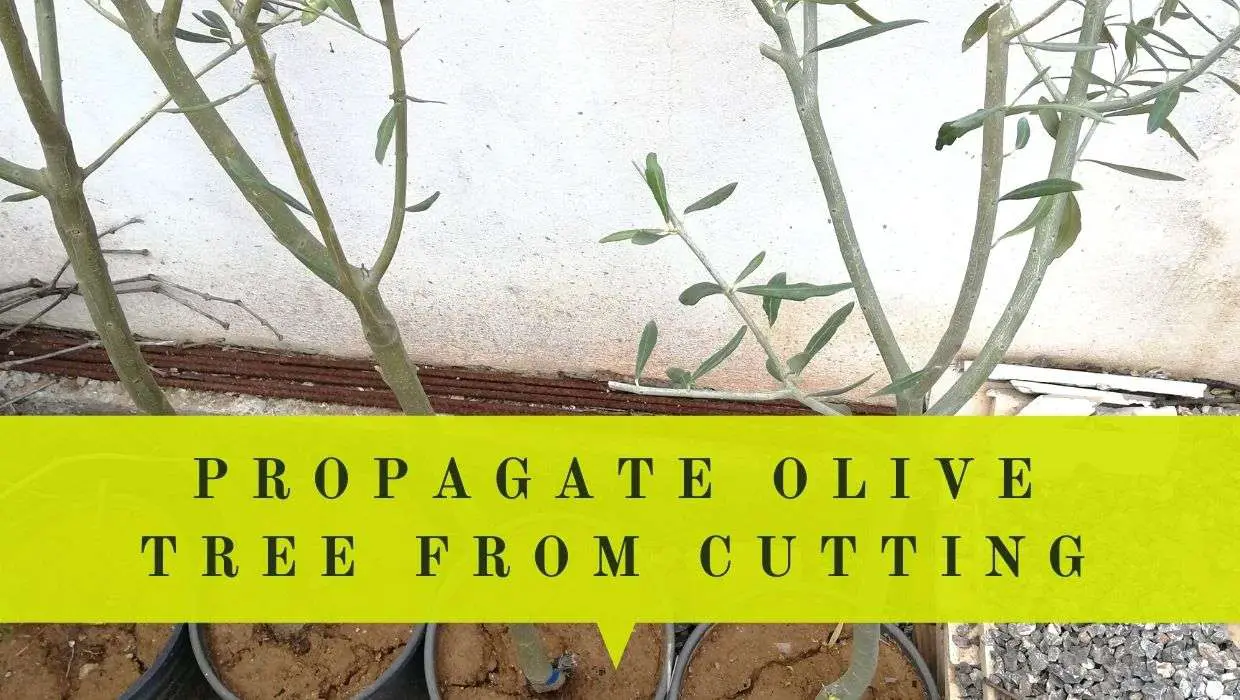
Growing olive trees from cuttings is an exciting and rewarding process. Not only does it save you money on buying new trees, but it also allows you to create clones of your favorite olive varieties. And the best part? You don’t need to be a gardening expert to do it!
You can propagate olive trees from cuttings, closely resembling the parent tree in genetic material, size, and olive fruit production. Choose the cutting you prefer: stem or root cutting; take it in the summer or late in autumn, plant it with rooting hormone, and wait a couple of months until you see new growth.
In this step-by-step guide, I’ll share my expert experience on propagating olive trees from cuttings. We’ll cover everything from selecting the right cuttings to caring for them as they grow into beautiful, fruit-bearing trees. So grab your gardening gloves, and let’s get started on this fascinating journey!
- I. Benefits of Propagating Olive Trees
- II. Types of Cuttings
- III. Choosing the Right Cuttings
- IV. Preparing the Cuttings
- V. Planting Olive Tree Cuttings
- VI. Caring for the Cuttings
- VII.Transplanting the Cuttings
- VIII. Tips for Success
- IX. Essentials for Olive Tree Propagation
- X. Frequently Asked Questions
- XI. Final Thoughts
I. Benefits of Propagating Olive Trees
Olive tree cuttings propagation refers to taking a small branch from an established olive tree to grow a new specimen. Once you discover the advantages, you’ll be eager to try this rewarding gardening technique for yourself. So, let’s dive in and explore the perks of growing your olive trees from cuttings!
Preserve Your Favourite Varieties
Do you have a favorite olive tree in your garden or an old, delicate tree with delicious fruit you’d love to see more of? Propagating from cuttings allows you to create genetic clones of your beloved tree and preserve old olive tree varieties. You can continue enjoying the same characteristics in your new trees, including fruit taste and oil quality.
Faster Fruit Production
Growing an olive tree from seed takes a long time. Olive trees grown by propagation reach maturity sooner, which is especially desirable for commercial growers. Propagated olive trees generally take 7-10 years to mature, while those grown from seed can need up to 15 years. This means you won’t have to wait years to enjoy the fruits of your labor (pun intended!).
Space-Saving Grafting Techniques
Olive tree grafting techniques allow you to grow multiple olive varieties on one tree, saving space. This option is excellent for people with smaller yards who want to enjoy the benefits of different olive types without needing multiple trees.
Save Money
Let’s face it, buying mature olive trees can be quite pricey. But by propagating from cuttings, you can grow as many trees as you like without breaking the bank. Plus, it’s a fun and engaging way to expand your olive tree collection.
Eco-friendly Gardening
By growing olive trees from cuttings, you’re giving new life to existing plant material, helping to reduce waste and promote sustainability. Plus, a thriving olive tree garden helps support local biodiversity and clean air.
Share the Love
There’s nothing more rewarding than sharing your passion for olive trees with others. Propagating from cuttings enables you to gift your friends and family their olive tree, spreading joy and fostering a love for gardening within your community.
Boost Your Gardening Skills
Propagating olive trees from cuttings is an excellent way to learn more about the fascinating world of plant propagation. You’ll become a more skilled and knowledgeable gardener as you experiment and refine your techniques.
II. Types of Cuttings
In this section, I’ll explore the different types of cuttings you can use to propagate your olive trees. Understanding the various options will help you choose the best method for your needs and improve your chances of successful propagation.
1. Stem Cuttings
Stem cuttings are one of the most popular ways to propagate olive trees. They are made from segments of shoots with lateral and/or terminal buds. There are three main types of stem cuttings:
1.1. Softwood Cuttings
Softwood cuttings come from the tree’s new growth, typically green and tender. These cuttings are taken in late spring or early summer when the tree is actively growing. Softwood cuttings can root relatively quickly, but they’re also more prone to drying out and require careful handling and attention.
1.2. Semi-hardwood Cuttings
Semi-hardwood cuttings are taken from the new growth of the olive tree in the current growing season after it has started to harden off. These cuttings strike a perfect balance between rooting potential and durability. They’re typically taken in late summer or early fall when the tree’s growth has started to slow down. This type of cutting is the most recommended for propagating olive trees, as it offers the best chance of success.
1.3. Hardwood Cuttings
Hardwood cuttings come from mature and dormant stems of an olive tree. These cuttings are more resilient and less susceptible to drying out, but they can take longer to root. Hardwood cuttings are often used for propagating other fruit trees but may be less successful with olive trees.
2. Root Cuttings
Root cuttings are obtained from pieces of the olive tree’s roots. This method can be effective for some plants but is not commonly used for olive tree propagation.
3. Single Node Cuttings
Single node cuttings are the least popular type of cutting for olive trees. They are made from a segment of a shoot with a leaf blade, a petiole (i.e., the stalk that attaches the leaf blade to the stem), and a piece of the stem with the associated axillary bud or lateral bud.
4. Grafting
Grafting is a slightly more advanced technique that involves joining a cutting (called a scion) to an existing, compatible rootstock. The two pieces eventually grow together, combining the desired characteristics of the scion with the established root system of the rootstock. This method allows you to grow multiple olive varieties on one tree and can be a space-saving option for smaller gardens. i
if you are interested in grafting, I have a separate article covering 4 Grafting techniques.
| Type of Cutting | Description | Best Time to Take | Pros | Cons |
|---|---|---|---|---|
| Softwood Stem Cutting | Made from soft and succulent shoots emerging early in a new growing season | Late spring or early summer | Quick rooting | Prone to drying out, require careful handling |
| Semi-hardwood Stem Cutting | Taken from the new growth of the olive tree in the current growing season after it has started to harden off | Late summer or early fall | Best chance of success, good balance | |
| Hardwood Stem Cutting | Made from mature and dormant stems of an olive tree | Late fall or early winter | Resilient, less susceptible to drying out | Slower rooting, less successful for olives |
| Root Cutting | Obtained from pieces of the olive tree’s roots | Late fall or early winter | Effective for some plants | Not commonly used for olive trees |
| Single Node Cutting | Made from a shoot segment with a leaf blade, petiole, and a piece of stem with the associated axillary or lateral bud | Spring or summer | Compact cutting size | Least popular, can be more difficult |
In this article, I will speak mainly about stem cuttings, the most popular and successful propagation method for olive trees.
III. Choosing the Right Cuttings
1. Selecting the Right Olive Tree Variety
With so many different olive tree varieties out there, better to match your needs and growing conditions. So, let’s explore some tips and tricks for choosing the perfect olive tree variety for you.
Climate Suitability
Olive trees generally thrive in Mediterranean climates with mild winters and hot, dry summers. However, some varieties are more cold-hardy or heat-tolerant than others. Research which varieties are best suited for your climate to ensure your trees have the best chance of thriving.
| Olive Tree Variety | Climate Suitability | Fruit Size | Oil Yield | Purpose | Growing Zone |
|---|---|---|---|---|---|
| Arbequina | Mild | Small | High | Oil, Table Olives | 8 – 10 |
| Manzanilla | Warm | Medium | Moderate | Table Olives | 8 – 10 |
| Kalamata | Mediterranean | Large | Moderate | Table Olives | 9 – 11 |
| Picual | Mediterranean | Medium | High | Oil | 8 – 10 |
| Frantoio | Mild, Cool | Medium | High | Oil | 8 – 10 |
| Leccino | Mild, Cool | Small | Moderate | Oil, Table Olives | 8 – 10 |
| Picholine | Mediterranean | Medium | Moderate | Table Olives | 8 – 10 |
| Koroneiki | Mediterranean | Small | High | Oil | 9 – 11 |
Note: The growing zones are based on the USDA Plant Hardiness Zone Map. In addition, here’s a brief explanation of the climate suitability terms used in the table:
- Mediterranean: This climate is characterized by hot, dry summers and mild, wet winters. Olive tree varieties suited for Mediterranean climates are typically drought-tolerant and can withstand higher temperatures during the growing season.
- Mild: Varieties labeled as mild can tolerate a wider range of temperatures, including slightly cooler conditions than Mediterranean varieties. These trees are suitable for regions with mild winters and moderate summers.
- Warm: Warm-climate olive tree varieties can handle higher temperatures but may not fare as well in cooler conditions. These trees are best suited for regions with consistently warm temperatures throughout the year.
- Cool: Cool-climate olive tree varieties can tolerate cooler temperatures better than those adapted for Mediterranean or warm climates. These trees may be more cold-hardy and can withstand colder winters or cooler summer temperatures.
Fruit and Oil Preferences
Are you growing olive trees primarily for their fruit or for producing olive oil? Different varieties produce olives with distinct flavors, textures, and oil content. If you’re aiming for table olives, choose a variety known for its delicious fruit, like Manzanillo or Kalamata. If olive oil is your priority, look for high-oil-content varieties such as Arbequina or Koroneiki.
Tree Size and Growth Habit
Olive trees can vary significantly in size and growth habit, from compact, dwarf varieties to large, sprawling trees. Consider how much space you have available in your garden and choose a variety that fits your needs. Smaller yards may benefit from dwarf or semi-dwarf varieties like Little Ollie or Picholine, while larger landscapes can accommodate more vigorous varieties like Mission or Frantoio.
| Olive Variety | Tree Size | Growth Habit |
|---|---|---|
| Arbequina | Small to Medium | Bushy, compact, weeping branches |
| Koroneiki | Small to Medium | Upright, compact growth |
| Leccino | Medium to Large | Upright, spreading canopy |
| Frantoio | Medium to Large | Vigorous, upright growth |
| Coratina | Medium to Large | Upright, moderately spreading canopy |
| Pendolino | Medium | Pendulous branches, semi-weeping habit |
| Picholine | Medium to Large | Upright, moderately spreading canopy |
| Maurino | Medium | Upright, spreading canopy |
| Kalamata | Medium to Large | Spreading canopy, slightly pendulous branches |
Note that tree size and growth habits can vary depending on environmental factors and specific cultivation practices. Here’s a brief explanation of each size category:
- Small: Olive trees considered small typically reach a height of 10 to 20 feet (3 to 6 meters) at maturity.
- Medium: Medium-sized olive trees grow to a height of 20 to 30 feet (6 to 9 meters) when fully mature.
- Large: Large olive trees can reach heights of 30 feet (9 meters) and above.
Disease Resistance
Some olive tree varieties are more resistant to common diseases and pests than others. If you’re looking to minimize the need for chemical interventions, choose a variety with a reputation for being disease-resistant, such as Leccino or Pendolino.
| Disease-Resistant Olive Varieties | Disease Resistance | Additional Characteristics |
|---|---|---|
| Arbequina | Verticillium Wilt | High oil content, adaptable to different environments |
| Leccino | Olive Knot, Leaf Spot | High oil content, cold-tolerant |
| Koroneiki | Olive Knot, Peacock Spot | High oil content, small-sized fruit, cold-tolerant |
| Frantoio | Peacock Spot, Leaf Spot | High oil content, vigorous growth |
| Coratina | Peacock Spot, Leaf Spot | High oil content, cold-tolerant |
| Pendolino | Olive Knot, Leaf Spot | Medium oil content, used as a pollinator |
| Picholine | Olive Knot, Leaf Spot | Medium oil content, used for table olives |
| Maurino | Olive Knot, Leaf Spot | High oil content, cold-tolerant |
| Kalamata | Olive Knot, Leaf Spot | Medium oil content, famous for table olives |
Note that while these varieties are known to resist certain diseases, no olive tree variety is entirely immune to all diseases.
For more about the most common diseases of olive trees, please read my article Problems with olive trees in pots.
2. Identifying Healthy Branches
The health and quality of the branches you choose will directly impact the success of your propagation efforts. So let’s dive into some tips for identifying the healthiest branches to ensure your new olive trees get off to the best possible start.
Vigorous Growth
Look for branches with signs of vigorous growth, as these will have the energy and resources needed to develop new roots. Healthy branches will have firm, evenly colored bark and an abundance of healthy leaves. Avoid branches that appear weak, spindly, or have sparse foliage.
Disease and Pest-Free
It’s essential to select branches that are free from disease and pests. Inspect the bark, leaves, and buds for any signs of damage or infestation. Keep an eye out for discolored leaves, peeling bark, or the presence of insects. Choosing a healthy branch will give your new olive tree the best chance of thriving.
Appropriate Age
Select branches that are neither too young nor old for the best results. Young, tender shoots may not have enough energy reserves to root successfully, while older, woody branches can be more challenging to root. Aim for branches at least one year old, with a mix of both mature and new growth.
Strong Buds
Healthy branches will have solid and plump buds, indicating the tree’s ability to produce new growth. Examine the branch closely and look for well-formed buds, not shriveled or damaged. The robust buds indicate that the branch is healthy and ready for propagation.
Proper Thickness
The ideal thickness for olive tree cuttings is about the diameter of a pencil (approximately 1/4 to 1/2 inch). This size balances the cutting’s ability to retain moisture and its capacity to develop new roots.
3. Ideal Size and Age
The size and age of your cuttings will significantly impact their ability to root and establish themselves as healthy, thriving trees. So let’s discuss the factors that make for the perfect olive tree cutting.
Age of Cuttings
Regarding olive tree propagation, semi-hardwood cuttings are your best bet. These cuttings are taken from the current growing season’s new growth after it has started to harden off. They strike the perfect balance between the potential to develop roots and the durability to withstand the rooting process. Typically, semi-hardwood cuttings are around one year old, with a mix of both mature and new growth.
Thickness
The ideal thickness for olive tree cuttings is about the diameter of a pencil (approximately 1/4 to 1/2 inch). This size balances the cutting’s ability to retain moisture and its capacity to develop new roots. Thinner cuttings may dry out too quickly, while thicker cuttings can struggle to form new roots.
Length
Your cuttings should be about 6 to 8 inches long. This length offers ample space for the cutting to develop roots and grow new shoots without being too unwieldy. Ensure your cutting has at least three or four healthy buds, which will encourage new growth and branching once the cutting has taken root.
Clean Cut
When taking your cuttings, use clean, sharp pruning shears to make a straight cut at the base of the branch. This will minimize damage to the parent tree and create a clean, even surface on the cutting for better root development. Additionally, make a diagonal cut at the top of the cutting, about 1/4 inch above a bud, to encourage new growth and help you remember which end is the top when planting.
4. Best Time to Take Olive Tree Cuttings
Timing is everything, especially when propagating olive trees from cuttings. When you choose which olive cultivar you want to propagate, take olive tree cuttings at the right time, depending on their type.
Type of Cutting
- Take softwood stem cuttings early on a cool day in late spring or early summer when new branches are green, and no blossoms appear. Softwood stem cuttings are flexible but will crack when bent enough. They also tend to dry out quickly, so keep them in moist paper towels until planted. It takes about a month for the roots to begin to form.
- Take semi-hardwood stem cuttings early on a cool day in the late summer to early fall when the new growth begins to harden, the green being overtaken by bark. These should still be flexible, and they also dry out quickly. Roots might not start forming until about six weeks have passed.
- If you go with hardwood stem or root cuttings, they are usually taken in the late autumn and winter months when the olive tree is dormant from the ends of higher branches where the growth is new. They can take up to several months to root and require a greenhouse.
- Single node cuttings are usually taken from healthy sections of the olive tree in spring or summer when the branch of the olive tree has at least 5 to 6 simple leaves.
Also important to note, if the tree produces olives, wait until the blooms have faded and the olives are visible before taking cuttings late in summer or early in autumn.
For olive tree growth seasonality, check out the olive growth cycle post.
Avoid Frosty Weather
It’s crucial to avoid taking cuttings during freezing temperatures, as this can damage delicate tissues and reduce the chances of successful rooting. Ensure the weather is consistently warm but not too hot when you plan to take your cuttings.
Morning Harvest
The best time of day to take cuttings is in the early morning when the tree’s tissues are full of moisture. Well-hydrated cuttings are more likely to root successfully and establish themselves quickly. Taking cuttings in the morning gives them the best possible start on their journey to becoming beautiful olive trees.

IV. Preparing the Cuttings
Getting your olive tree cuttings ready for propagation is a crucial step in the process, and I’m here to share all my know-how to ensure you’re set up for success.
1. How To Take Olive Tree Cuttings
As to grow an olive tree from a stem cutting, here are steps on how to take it:
- First things first, make sure your cutting is the right length. Take at least 6 inches (15 cm) but no longer than 12 inches (30 cm) long cuttings from the tip of a healthy olive branch with sharp scissors. This length provides enough space for root development and allows the cutting to focus its energy on new growth. The best is to cut young olive branches, those under a year old (named softwood stem cuttings), with a 1/4-inch (0.6 cm) diameter.
- To maximize your cutting’s potential, trim the bottom end at a 45-degree angle 1/8-inch (0.3 cm) below a leaf node. This angled cut increases the surface area available for root development and helps the cutting absorb more water and nutrients.
- Next, remove the lower leaves from the cutting, leaving only the top two or three pairs of leaves. This step reduces water loss through transpiration and allows the cutting to focus on rooting.
- If your cutting has any flowers or buds, remove them too. This helps the cutting prioritize rooting and new growth over fruiting or flowering.
- Now, it’s time to clean the cutting. Gently wash it in a mild soapy water solution to remove any dirt, insects, or potential pathogens. Rinse thoroughly with clean water and let it air dry for a few minutes.


2. How to Store Cuttings
I’ve got you covered with my expert tips on how to store your olive tree cuttings until you’re ready to plant them. By following these simple steps, you’ll be able to preserve the vitality of your cuttings and ensure successful propagation later on.
Keep Cuttings Hydrated
Olive tree cuttings must be kept hydrated and stored in a moist environment until planted in a moisture-retentive medium. Gently mist the cuttings with water and wrap them in moist paper towels or a damp cloth. Make sure the wrapping material is not soaking wet, as excess moisture can lead to rot.
Additionally, here is a detailed explanation of olive tree-cutting storage peculiarities depending on the type:
- Softwood stem cuttings of an olive tree need more attention to keep them from drying out than those from semi-hardwood and hardwood cuttings. They are stored in a high-humidity environment until planted in a moisture-retentive medium.
- Semi-hardwood stem cuttings are stored in a dark, humid environment until planted in a moisture-retentive medium with high humidity levels.
- Hardwood stem cuttings are kept in a cool, moist environment until they can be planted in a moisture-retentive medium such as vermiculite with high humidity.
- Root cuttings and single node cuttings are stored in high humidity and quickly inserted into the soil, like perlite, vermiculite/pumice, or compost.
Seal and Protect
Place the wrapped cuttings in a plastic bag or container with a tight-fitting lid. The goal is to create a humid environment that mimics the conditions for successful rooting. Be sure to leave some air in the bag or container to maintain proper air circulation.
Maintain Optimal Temperature
Store your cuttings in a cool, dark place with a stable temperature between 40°F and 50°F (4°C and 10°C). A refrigerator is an excellent option but place the container away from any fruits or vegetables, as these can release ethylene gas, harming the cuttings.
Check Regularly
Monitoring your cuttings every few days to ensure they remain healthy. If necessary, check for any signs of mold, rot, or dehydration, and adjust the moisture level or air circulation.
Don’t Store Too Long
Although cuttings can be stored for several weeks, it’s best to propagate them as soon as possible to ensure the highest chance of success. The longer the cuttings are stored, the lower their chances of successful propagation.
3. Pre-Soaking Cutting in Water
Pre-soaking cuttings in water before planting helps rehydrate the plant tissue, ensuring the cutting remains healthy and robust. This hydration step is particularly important if your cuttings have been stored for a while or lost moisture during transport.
How to Pre-soak Your Cuttings?
- Fill a clean container or bowl with room-temperature water. Avoid using very cold or hot water, which can shock the cutting and hinder root development.
- Submerge the cut ends of your cuttings in the water, ensuring that the bottom third of the cutting is underwater. Be careful not to fully submerge the entire cutting, as this can lead to rot or other issues.
- Allow your cuttings to soak for a few hours or overnight, depending on their condition. Softwood cuttings generally need a shorter soaking time, while hardwood cuttings may benefit from a longer soak.
- After soaking, gently remove the cuttings from the water and allow any excess moisture to drain off. You can gently shake the cuttings or dab them with a clean towel to remove excess water.
- Proceed with the propagation process, applying rooting hormone and planting your cuttings in the appropriate medium.
V. Planting Olive Tree Cuttings
1. Choosing the Right Growing Medium
The growing medium provides your cuttings with the right moisture, aeration, and nutrient balance. An ideal medium will help your cuttings establish strong, healthy roots and set the foundation for a thriving olive tree.
Now, I must emphasize that the rooting mixture we’re talking about is not garden soil but is much lighter and suitable for growing your new olive trees. The key is to choose something that will retain water and not be too dense for the newly sprouting olive roots. Young, fresh roots should have adequate water and lots of free, open spaces to spread out through.
Make Your Rooting Medium
You can purchase a pre-made rooting medium at any garden center or mix your own. If you choose to make your mix, you will need washed sand (also known as masonry sand, playground sand, or washed sand) and milled peat in powdered form. Mix these two components half and half and saturate them with water. This custom blend will provide the right balance of moisture retention and aeration for your olive tree cuttings.
Options for Growing Mediums
In addition to the custom sand and peat mixture, there are several other options for growing mediums:
- Perlite: This lightweight, inorganic material is an excellent choice for olive tree cuttings. It offers superb aeration, ensuring that your cuttings have access to the oxygen they need while retaining moisture.
- Vermiculite: Another popular option is vermiculite, a mineral-based medium with excellent water-holding capacity. Vermiculite also helps maintain a stable pH level in the growing environment, which is essential for healthy root development.
- A mixture of perlite and peat moss: Combining perlite with peat moss creates a well-balanced growing medium that offers both excellent aeration and moisture retention. This mixture can be adjusted to suit your specific needs – simply increase the proportion of perlite for increased drainage or add more peat moss for better water retention.
- Sand and compost: A mixture of coarse sand and well-aged compost is another suitable choice for olive tree cuttings. The sand provides excellent drainage, while the compost delivers nutrients to promote healthy root growth.
| Growing Medium | Description | Pros | Cons |
|---|---|---|---|
| Perlite | A lightweight, volcanic rock material that is expanded through heat treatment. | Good aeration, excellent drainage, lightweight. | Can dry out quickly, doesn’t hold nutrients well. |
| Vermiculite | A mineral-based material that is expanded through heat treatment. | High water retention, good nutrient holding capacity. | Less aeration compared to perlite, can compact over time. |
| Peat Moss | Decomposed plant material, often harvested from peat bogs. | High water retention, good nutrient holding capacity. | Can be acidic, a non-renewable resource, may require a wetting agent. |
| Coconut Coir | Fiber extracted from the outer husk of coconuts. | Renewable resource, good water retention, adequate aeration. | May require additional nutrients, can be more expensive. |
| Sand and Peat Mix | A mixture of washed sand and milled peat, often in a 1:1 ratio. | Good drainage, a balance of water retention and aeration. | May require additional nutrients, can be heavy. |
| Pre-made Rooting Mix | A commercially prepared mix designed for rooting cuttings. | Balanced blend of ingredients, often includes nutrients and wetting agents. | More expensive, may contain ingredients not ideal for olive tree cuttings. |
How to Prepare Growing Medium
Before planting your cuttings, prepare your chosen growing medium properly. Moisten the medium with water, ensuring it’s damp but not waterlogged. Fill your chosen planting container – such as pots or nursery trays – with the prepared medium, gently tamping it down to remove any air pockets.
2. Using the Correct Container and Size
Choosing the correct container for olive tree cuttings is important for several reasons:
- It needs drainage and airflow, both vital for healthy root development.
- The container size can affect young olive trees’ growth rate and overall health.
- The correct container ensures your cuttings have the necessary space to grow and flourish.
Here’s what you need to know about selecting the perfect container for your olive tree cuttings:
Drainage is Key
Regardless of the type of container you choose, it must have proper drainage. Look for pots or trays with drainage holes in the bottom to allow excess water to escape. This helps prevent waterlogging and root rot, which can be detrimental to your cuttings’ health.
Material Matters
Olive tree cuttings can be grown in various container materials, including plastic, terracotta, or fabric pots. While each material has its pros and cons, the most essential factor is that it offers adequate drainage and aeration.
| Container Type | Material | Pros | Cons | Ideal for |
|---|---|---|---|---|
| Plastic Pots | Lightweight plastic | Affordable, easy to find, retains moisture well | Less breathable, can become brittle over time | Softwood and semi-hardwood cuttings |
| Terra Cotta Pots | Porous clay | Breathable, natural material, promotes healthy root growth | Heavier, more fragile, may dry out quickly | Breathable, natural material promotes healthy root growth |
| Nursery Pots | Thin plastic | Affordable, easy to find, lightweight | Less durable, may not last for multiple uses | Softwood and semi-hardwood cuttings |
| Fabric Pots | Fabric or felt | Excellent aeration, promotes healthy root growth, lightweight | May dry out quickly, may require more frequent watering | Semi-hardwood and hardwood cuttings |
| Biodegradable Pots | Peat, coconut coir, or other biodegradable material | Environmentally friendly, can be planted directly into the ground, no transplant shock | May decompose quickly, may not last long enough for hardwood cuttings | Softwood and semi-hardwood cuttings |
| Rooting Trays | Plastic or polystyrene | Allows for multiple cuttings in one container, space-efficient | Less durable, may not be suitable for larger cuttings | Softwood cuttings and single node cuttings |
Size it Up
The size of your container will depend on the type of cutting and the expected growth rate. Generally, a container 4 to 6 inches in diameter is suitable for most olive tree cuttings. Larger containers may be needed for hardwood cuttings or for growing multiple cuttings in the same pot.
Remember that your cuttings will eventually need to be transplanted into a larger pot or the ground as they grow, so starting with a smaller container can make this process easier.
Keep it Clean
Before planting your cuttings, ensure your containers are clean and free of debris or pathogens. If reusing containers, clean them thoroughly with a 10% bleach solution and rinse well to remove any residue. This will help prevent the spreading diseases and pests, ensuring a healthy environment for your olive tree cuttings.

Use a pencil and poke a 2 – 3 inch (5 – 8 cm) deep hole into the center of the rooting mixture.
3. Dip In Rooting Hormone
You might be wondering what precisely this magical powder does. Well, rooting hormones contain auxins, naturally occurring plant hormones that encourage root development. Applying a small amount of rooting powder to the base of your cuttings gives them a boost that can help kickstart their growth.
Benefits of Using Hormone Rooting Powder
- Faster Root Development: By providing an external source of auxins, hormone rooting powder encourages the cuttings to produce roots more rapidly, increasing their chances of survival and overall success.
- Improved Root System: Rooting hormone speeds up root development and promotes a more robust and extensive root system. This means your new olive trees will have a stronger foundation for healthy growth.
- Reduced Risk of Rot: Using rooting hormone rooting powder can help protect your cuttings from fungal infections and rot, ensuring they remain healthy during the vulnerable early stages of development.
- Increased Propagation Success: Ultimately, the combination of faster root growth, a better root system, and protection from rot results in a higher overall success rate for your olive tree propagation efforts.
Selecting the Right Rooting Hormone
When selecting the right hormone rooting powder, various options are available in the market. Choose a product specifically designed for woody plants like olive trees, and follow the instructions provided by the manufacturer.
If you don’t have a commercial rooting hormone at the moment of planting, there are many options for natural rooting hormones. It is known that human saliva works. In addition, the number of trace elements in diluted organic apple cider vinegar (approximately a shallow teaspoon for every liter of water) is highly beneficial to olive tree growth and solving bacterial problems. Cinnamon is also good at protecting cuttings from fungal and bacterial issues and is frequently used together with willow water, which encourages root growth.
For more information, check out my article homemade natural hormones for rooting.
How to Apply Rooting Hormone?
To use hormone rooting powder, dip the freshly-cut end of your prepared cutting into the powder, ensuring it’s thoroughly coated. Tap off any excess powder, and then plant the cutting as usual.
The rooting hormone will promote healthy solid root development on the cutting. The rooting hormone also kills fungus and bacteria to prevent the branch from rotting and contains a growth hormone to speed the formation of roots.

Last update on 2026-05-12 / Affiliate links / Images from Amazon Product Advertising API
4. Properly Inserting Cuttings into the Medium
After selecting the suitable cuttings, preparing them, and choosing the perfect growing medium and container, the next step is inserting them into the medium properly. These are the steps:
Create a Hole
Before you place the cutting in the medium, create a hole using a pencil, dibber, or your finger. This helps avoid rubbing off the rooting hormone you applied earlier. Make sure the hole is deep enough to accommodate the length of your cutting while leaving at least one or two nodes above the surface. So use a pencil and poke a 2 – 3 inch (5 – 8 cm) deep hole into the center of the rooting mixture.
Plant the Cuttings
Gently insert the cutting into the hole you created in the rooting medium, ensuring the hormone-treated end goes in first. Be careful not to force the cutting, which may damage or remove the rooting hormone.
Firm the Medium
Once the cutting is in place, gently firm the growing medium around the base of the stem. This will help provide support to the cutting and eliminate air pockets that could cause the cutting to dry out.
Provide Support
If your cutting is particularly tall or top-heavy, you may need to provide additional support. You can use a small bamboo stake or a similar support structure to keep the cutting upright.
Water Thoroughly
After planting, water the cuttings gently but thoroughly. This will help settle the medium around the cutting and ensure that it has adequate moisture to support root growth.
Label Your Cuttings
If you’re working with different olive tree varieties, labeling your cuttings clearly is a good idea. This will help you keep track of each variety as they grow and ensure you provide the proper care for each one.
5. Ideal Planting Depth and Spacing
Paying attention to these details will ensure your cuttings have the best chance of developing strong roots and growing into healthy olive trees.
Planting Depth
When inserting your cutting into the growing medium, make sure to plant it deep enough so that at least one or two nodes (the points on the stem where leaves or branches emerge) are buried in the medium. This will encourage root formation and help anchor the cutting. However, avoid planting the cutting too deep, as this could cause the stem to rot. A good rule of thumb is to plant the cutting about 1-2 inches (2.5-5 cm) deep.
Spacing Between Cuttings
Giving your cuttings enough space is crucial for proper air circulation and to prevent the spread of diseases. When planting multiple cuttings in a single container or tray, space them at least 2-3 inches (5-7.5 cm) apart from each other. This will allow for enough room for each cutting to grow without competing for space, light, or nutrients.
Spacing Between Containers
If you’re using individual pots or containers for your cuttings, space them at least 6 inches (15 cm) apart to ensure proper air circulation and to avoid overcrowding as the cuttings grow.
Grouping Similar Varieties
If you’re working with different olive tree varieties, try to group similar ones together. This will help you provide consistent care for each variety and make it easier to monitor their progress.
Following these planting depth and spacing guidelines will create an optimal environment for your olive tree cuttings to root and grow.
Now that your cuttings are in place, it’s time to focus on providing the right environment for them to root and grow.
VI. Caring for the Cuttings
1. Temperature Control
Temperature control is one key factor in creating the perfect environment for your olive tree cuttings. As a seasoned olive tree grower, I’ve discovered some temperature tips that will give your cuttings the best chance to thrive.
Olive trees prefer a mild climate, so keep the temperature consistent and within the proper range for optimal growth. For most olive tree varieties, maintaining a temperature of 70-80°F (21-27°C) during the day and 60-70°F (16-21°C) at night is ideal.
Indoors Propagation
If you’re growing your cuttings indoors, you can use a thermometer to monitor the temperature in your growing area. You can adjust the temperature using heating mats, space heaters, or air conditioning if needed. Remember to avoid placing your cuttings near drafty windows, doors, or vents, as these can cause temperature fluctuations that may harm your delicate cuttings.
Outdoor Propagation
For outdoor propagation, choose a sheltered area that receives plenty of sunlight but is protected from harsh winds or temperature extremes. If temperatures are expected to drop, consider moving your cuttings indoors or providing temporary protection with row covers or frost blankets.
2. Humidity Levels
First, it’s essential to understand that the ideal humidity for olive tree cuttings is around 70-80%. To achieve this, you can use a humidity tray or simply mist the cuttings with water regularly. When using a humidity tray, place a layer of pebbles or gravel in the tray and add water just below the surface of the pebbles. This will create a humid environment around your cuttings as the water evaporates.
Keep Olive Tree Cuttings Moist
Mist the olive tree cutting twice daily for the first few days. Then check the cuttings every two to three days and add a little extra water when the rooting medium looks dry.
Important to note that the softwood stem cuttings must always be moist and placed in a plastic bag after watering.
Within three to four weeks, olive tree cuttings should start to root. If buds begin to break less than three weeks after the cutting was planted, cover the container with a plastic bag to improve humidity and decrease water loss. Olive tree cutting roots need to form before buds open to supply the shoots with water and nutrients.
After the roots have formed on the cuttings, reduce watering to once a week and stop misting the cuttings.

Another way to keep the olive tree cuttings moist is to cover the container with a plastic bag to imitate a mini greenhouse. Cut a few slits in this bag to let it breathe and prevent mold growth. Fasten the mouth of the bag around the container with a rubber band or string – this will keep in moisture. Watch for olive roots to grow.
Also, you can transform a styrofoam box into a low-cost propagation case. First, fill up a styrofoam box with moist sphagnum moss. Then insert olive tree cuttings into the rooting medium, and use sand as support. To maintain a high-humidity environment, you can put the styrofoam box and cuttings inside a plastic bag.
Outdoor Propagation
For outdoor propagation, choose a sheltered location that isn’t exposed to strong winds, which can dry out the air and soil around your cuttings. Also, be sure to water your cuttings regularly, especially during dry spells, to keep the humidity levels up.
3. Light Requirements
Olive trees are sun-loving plants and thrive in environments that receive plenty of bright, indirect light. When it comes to cuttings, you’ll want to make sure they get enough light to support their growth, but not so much that they become scorched or stressed.
In the early stages of root development, it’s best to provide your cuttings with indirect light. This means placing them in a bright, well-lit area but out of direct sunlight. A windowsill that receives filtered light through a sheer curtain is an excellent spot for your cuttings. Alternatively, you can place them under a grow light that mimics natural sunlight, ensuring they receive the light they need to grow.
As your cuttings start to root and develop new growth, you can gradually increase their exposure to direct sunlight. Begin by giving them an hour or two of morning sun, then slowly extend the time they spend in direct sunlight as they become more established.
After your cuttings have rooted and started to grow, they’ll benefit from at least 6 to 8 hours of direct sunlight per day. Olive trees are hardy plants that can adapt to a wide range of light conditions, but they’ll produce their best growth and fruit when they receive plenty of sun.
4. Watering
The key to successful olive tree cuttings is striking the right balance with watering. You want to keep the rooting medium consistently moist but not soggy, as overly wet conditions can lead to rot or disease. Initially, mist your cuttings twice daily to maintain a moist environment. As roots develop, you can gradually reduce watering to once every two or three days, ensuring the rooting medium never dries out completely.
Once your cuttings have established a healthy root system, you can transition to a more regular watering schedule. Olive trees are drought-tolerant plants but still need consistent moisture for optimal growth. Water your young olive trees deeply and thoroughly, then allow the soil to dry slightly before the next watering.
5. Feeding
In the early stages of growth, your olive tree cuttings will primarily rely on the nutrients present in the rooting medium. As they grow, they’ll need additional nutrients to support their development.
Start feeding your cuttings with a balanced, water-soluble fertilizer once they have rooted and started to produce new growth. Dilute the fertilizer according to the manufacturer’s instructions and apply it every 4 to 6 weeks during the growing season. Make sure to water your cuttings thoroughly after each feeding to help distribute the nutrients evenly throughout the soil.
As your olive tree cuttings mature, you can switch to a slow-release granular fertilizer specifically formulated for fruiting trees. This will provide your olive trees with the nutrients they need for optimal growth and fruit production.
6. Monitoring for Pests and Diseases
Here are some tips on what to look for and how to deal with common problems.
Common Pests
Some pests you might encounter on your olive tree cuttings include scale insects, mites, and aphids. These tiny critters can cause significant damage by sucking the sap from your plants, leading to stunted growth, yellowing leaves, and even plant death if left untreated.
To deal with these pests, you can use insecticidal soap or a natural, homemade remedy like a mixture of water, dish soap, and vegetable oil. Spray the affected areas thoroughly, being sure to coat both the tops and bottoms of the leaves. Repeat the treatment every 7 to 10 days until the pests are under control.
Common Diseases
Olive tree cuttings can also be susceptible to diseases like Verticillium wilt, root rot, and leaf spot. These diseases can cause wilting, yellowing, or browning of leaves and stems, as well as overall decline in plant health.
To prevent and treat these diseases, it’s essential to maintain proper watering practices and good air circulation around your cuttings. Avoid overwatering and make sure the soil drains well to prevent root rot. Prune away any infected branches and leaves to limit the spread of the disease, and always sanitize your pruning tools between uses to prevent cross-contamination.
Regular Inspection
Make it a habit to regularly inspect your olive tree cuttings for signs of pests and diseases. Catching issues early on is key to keeping your young trees healthy and vigorous.
If you notice any unusual symptoms, don’t hesitate to take action and consult with a local expert or horticulturist if needed.
VII.Transplanting the Cuttings
1. How Long Does it Take for Olive Tree Cuttings to Root
Establishing a solid root system for olive tree cuttings take 3 to 12 weeks. It depends on several factors, such as the cutting type, the olive tree’s variety, and the environmental conditions.
Softwood cuttings tend to root faster than semi-hardwood and hardwood cuttings, but each has its timeline. See the table below:
| Type of Cutting | Estimated TimeFrame to Root |
|---|---|
| Softwood | 3 – 6 weeks |
| Semi-Softwood | 6 – 9 weeks |
| Hardwood | 9 – 12 weeks |
While waiting for your cuttings to root, pay close attention to the signs of root development. One of the first indicators is resistance when you gently tug on the cutting. This resistance means the roots are starting to anchor themselves in the growing medium.
Also, keep an eye out for new growth, like fresh leaves and shoots, which clearly indicates that your cuttings are thriving.

2. Transplanting Time To A Permanent Location
One of the most exciting moments in the olive tree growing journey is when your cuttings are ready to be transplanted into their permanent home. Let me share my tips on how to determine when your olive tree cuttings are ready for this big step.
Root Development
The first and most important sign that your cuttings are ready for transplant is the presence of a well-developed root system. Gently tug on the cutting; if you feel some resistance, it’s likely that roots have begun to grow.
You can also carefully remove the cutting from the growing medium to check for a healthy network of roots. Remember, be gentle and try not to disturb the fragile roots too much.
Once the olive tree cuttings have roots longer than 1 inch (3 cm), you can transplant them into individual planting pots with sterilized potting soil. Plant cuttings at the same depth at which they were rooted, and ensure to protect them from weather extremes for at least a year.

New Growth
Another indication that your cuttings are ready for transplant is the presence of new growth. Keep an eye out for fresh leaves and branches emerging from the cutting, as these are signs that it’s getting established and ready to be moved to a larger pot or the ground.
Time Frame
Although the exact timing can vary depending on the specific olive variety and growing conditions, most olive tree cuttings are ready to be transplanted within 3 to 6 months after planting. Use the root development and new growth indicators as your primary guides, and remember that patience is crucial in this process.
A Word of Caution
Transplanting your cuttings too early can be detrimental to their growth and survival. It’s essential to wait until they’ve developed a healthy root system and show signs of new growth before making the move. Rushing the process could lead to transplant shock, stunted growth, or even the death of the cutting. Trust me, it’s worth the wait to give your olive tree cuttings the best chance for success!
3. Preparing the Transplant Site
First, scout out a sunny spot for your olive trees. They adore sunshine and need at least 6 to 8 hours of direct sunlight daily. Remember, more sun equals happier trees!
Next, consider the soil. Olive trees are hardy and can tolerate various soil types, but well-draining soil is essential. They don’t like wet feet, so avoid areas with standing water or heavy clay. A soil pH between 6.0 and 7.5 is ideal for olive trees, so it’s a good idea to test your soil and adjust if needed.
Before transplanting, give the area a good once-over. Remove any weeds, rocks, or debris that could hinder your young tree’s growth. If you have heavy clay or compacted soil, loosen it up and add some organic matter like compost or well-rotted manure to improve drainage and fertility.
Finally, dig a hole that’s about twice the width of your cutting’s root ball, but no deeper than the root ball itself. This gives the roots enough space to spread out, ensuring a strong and healthy start for your young olive tree.
4. Transplanting Cuttings into the Ground or Larger Containers
Now that your cuttings have rooted and you’ve prepared the transplant site, it’s time for the exciting part—transplanting your cuttings into the ground or larger containers. Let me share some tips to make this process smooth and successful.
Choose the Right Time
The best time to transplant your olive tree cuttings is during early spring or fall when temperatures are mild. This allows the roots to establish themselves before the extreme temperatures of summer or winter set in.
Gently Remove the Cutting
Carefully remove the cutting from its current container, taking care not to damage the delicate new roots. Gently loosen the root ball, teasing apart any tangled roots to help them spread out more easily once planted.
Plant the Cutting
Place the cutting in the prepared hole or container, making sure the top of the root ball is level with the soil surface. Gently backfill with soil, and firm it down with your hands to eliminate air pockets. Remember not to plant the cutting too deep, as this can lead to root rot and other problems.
Water Well
After transplanting, give your young olive tree a good, deep watering to help settle the soil around the roots. Be mindful of your tree’s water needs going forward, and avoid over-watering. Olive trees prefer slightly dry soil, so let the top inch or two dry out between waterings.
Mulch and Stake (optional)
Apply a layer of organic mulch around the base of the tree to help retain moisture, suppress weeds, and regulate soil temperature. If your tree needs extra support, consider staking it to prevent damage from strong winds or heavy fruit loads.
Container Considerations
If transplanting into a container, choose a well-draining pot with plenty of room for root growth. Make sure the container has drainage holes, and use a high-quality potting mix designed for trees or a well-draining soil mix.
Also, check out valuable tips on how to plant olive trees in a container or pot.
6. Post-transplant Care
Watering
After transplanting, water your olive trees deeply to help them settle into their new home. Over the next few weeks, keep an eye on the soil moisture and water as needed, allowing the top inch or two of soil to dry out between waterings. Gradually decrease the frequency of watering as your trees establish themselves.
Fertilizing
Wait a few weeks before fertilizing your newly transplanted olive trees. Start with a balanced, slow-release fertilizer, applying according to the package instructions. As your trees grow, adjust your fertilizer regimen based on the specific needs of your trees, such as their age, size, and fruit production.
Pruning
In the first year, focus on shaping your young olive trees by removing any weak, broken, or crossing branches. This helps to establish a strong, open canopy that promotes better air circulation and sunlight penetration. In the following years, continue to prune for shape and to remove dead, damaged, or diseased wood.
Pest and Disease Management
Keep an eye out for any signs of pests or diseases on your transplanted olive trees. Early detection and intervention are key to maintaining your tree’s health. Implement organic or chemical control measures as needed, following the recommended guidelines.
Protection
Young olive trees can be susceptible to frost, so be prepared to provide protection during cold snaps, especially in the first few years. Cover your trees with frost cloth or move container-grown trees to a sheltered location when frost is expected.
| Post-transplant Care Steps | Description |
|---|---|
| Watering | Water deeply after transplanting, then monitor soil moisture and water as needed. Gradually decrease watering frequency as trees establish. |
| Fertilizing | Wait a few weeks, then use a balanced, slow-release fertilizer. Adjust the regimen based on tree age, size, and fruit production. |
| Pruning | Shape the young trees by removing weak, broken, or crossing branches in the first year. Continue to prune for shape and to remove dead, damaged, or diseased wood in the following years. |
| Pest and Disease | Monitor trees for signs of pests or diseases, intervening early as needed with organic or chemical control measures. |
| Protection | Provide frost protection for young trees during cold snaps, using frost cloth or moving container-grown trees to sheltered locations. |
VIII. Tips for Success
1. Troubleshooting Common Issues
Olive tree growing isn’t without its challenges, but don’t let that discourage you! When you face issues like wilting leaves or slow growth, take a step back, assess the situation, and identify the possible causes. It could be a watering issue, nutrient deficiency, or a pest infestation. Once you’ve figured it out, address the problem and learn from the experience.
Check out the most common issues with olive trees, in my comprehensive guide on problems with olive trees in pots.
2. Learning from Experienced Olive tree Growers
One of the best ways to succeed in growing olive trees is to learn from those who have been there before. Reach out to fellow growers in your area or online forums to ask questions, share experiences, and gain valuable insights.
Experienced growers can offer time-tested advice on best practices, which will help you avoid common pitfalls and set you on the path to success.
3. Experimenting with Different Varieties and Techniques
Finally, don’t be afraid to experiment! With so many olive tree varieties available, it’s worth trying different types to see which ones thrive best in your specific environment. Experiment with various growing techniques, such as using different rooting mediums, hormone treatments, or planting methods.
Keep an open mind, learn from your successes and failures, and enjoy the journey of cultivating your very own olive trees.
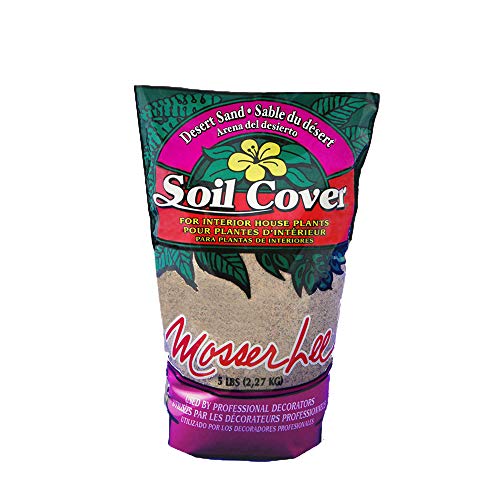
IX. Essentials for Olive Tree Propagation
These are the highly-rated products you may need for olive tree propagation:
- Viagrow Rooting Container
- Mosser Lee Dessert Sand Soil
- Hormex Rooting Powder


Last update on 2026-05-12 / Affiliate links / Images from Amazon Product Advertising API
X. Frequently Asked Questions
Can you root olive tree cuttings in water?
Yes, you can start rooting olive tree cuttings in water. However it is lower success rate than rooting them directly in sandy soil. Instead, use a well-draining, moisture-retentive rooting medium for better results.
How to encourage olive roots to grow from cuttings?
Ensure you provide the proper environment to encourage root growth in olive tree cuttings. Use a well-draining, moisture-retentive rooting medium and maintain consistent moisture levels. You can also use a rooting hormone to promote faster root development. Additionally, provide the cuttings with adequate humidity, temperature, and indirect light, contributing to successful root growth.
How long does it take the newly propagated olive tree to produce olives?
A newly propagated olive tree can take 3 to 5 years, or even longer, to produce olives. The time it takes depends on the tree’s age, variety, growing conditions, and overall health. You can encourage your olive tree to grow and produce fruit more quickly by providing proper care and pruning.
When should I transplant my rooted olive tree cutting?
Transplant your rooted olive tree cutting when it has developed a healthy root system, usually after a few months. You can gently remove the cutting from the rooting medium to check the root development before transplanting.
How often should I water my olive tree cutting during propagation?
During the initial stages of propagation, keep the rooting medium moist but not soggy. As the cutting develops roots and grows, gradually reduce the watering frequency.
Do I need to use a rooting hormone for my olive tree cutting?
Although not strictly necessary, using a rooting hormone can increase the success rate of your olive tree cutting propagation by promoting faster and healthier root development.
Can I propagate olive trees from cuttings even as a beginner gardener?
Yes! With patience, practice, and following the proper steps, even beginner gardeners can successfully propagate olive trees from cuttings.
XI. Final Thoughts
There’s something truly magical about growing your own olive trees from cuttings. It’s a journey filled with anticipation, patience, and ultimately, the satisfaction of seeing your little cuttings transform into beautiful, fruit-bearing trees.
Not only is propagating olive trees from cuttings a fun and rewarding hobby, but it also comes with significant environmental and economic benefits. By growing your own olive trees, you can help reduce the demand for commercially produced olives and save money by cultivating your own delicious olives at home.
Propagating olive trees from cuttings is an excellent way of multiplying your olive trees and even sharing the tree love with friends. It can be hard to give away an olive tree that you’ve been nursing from its beginning. But it is such a fantastic gift, as well as rewarding!
I hope this article is helpful for you to grow olive trees from cuttings and trade with your friends. Once you are ready to pot your rooted olive tree, check out repot olive tree post. It won’t be a repotting process, but there are some excellent tips about potting in general. Thank you so much for visiting, and let us know how it went to grow your olive trees!

Check out 20 tips on how to grow olive trees in pots indoors!
Read Next
HOW TO GROW OLIVE TREES FROM SEEDS?
Learn More
- How to Root Olive Tree Cuttings in Water?
- Grafting Olive Trees – 4 Techniques
- Olive Tree Growth Cycle
- How Fast Olive Trees Grow?
- Where Do Olive Trees Grow Best?
Join our Facebook community: Olive Tree Growers and Enthusiasts
Hi, I’m Vangelis, the founder of Oliviada and an established olive oil expert from Kalamata, Greece. My expertise isn’t just in producing quality Extra Virgin Olive Oil, but also in the cultivation and care of olive trees themselves. I am deeply committed to sharing my knowledge and know-how, helping others understand the intricacies of olive tree growing and the creation of quality olive oil.
Are You Looking to Buy an Olive Tree?
If you are looking to add more potted trees or other plants to your orchard, or if you like to replace a neglected olive tree, the best places to get them are your local nursery or an online nursery.
One of the most reliable and the world's largest online nurseries is Fast Growing Trees. They deliver fast, neat, and healthy plants backed with a 30-day guarantee.